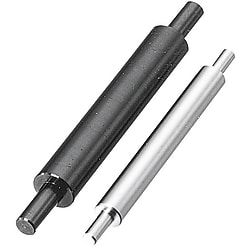
Rotary Axes / Offset on Both Sides / Optional Machining (SFRMHQ30-120-F65-P25-T65-Q25)
Product Details:
Manufacturer part number: SFRMHQ30-120-F65-P25-T65-Q25
Brand: MISUMI
Price: Please contact the support for quotation
Delivery time: 5 Days
Technical Data:
Material: [Steel] EN 1.1191 Equiv.
Hardness: No Hardened
Surface Treatment: [Surface Treatment Provided] Black Oxide
D Tolerance: h9 (Cold-drawn)
Shaft Dia. D: 30 mm
- Order quantities extended (D-JIT)
Part Number
Once your search is narrowed to one product,
the corresponding part number is displayed here.
SFRMHQ30-120-F65-P25-T65-Q25
- Drawing / Specifications
- 3D Preview 3D preview is available after complete configuration
- Part Numbers
- More Information
- Catalog
- Technical Information
Dimensional Drawing

 . Surface roughness for h7 (Ground) and g6 (Ground) is
  .
.[ ! ] High hardness stainless steel may have a center hole.
■Tolerance Table
|  ■Circularity and Straightness ■Concentricity and Perpendicularity |
| D | Circularity M | |
| over | or Less | |
| 5 | 13 | 0.004 |
| 13 | 20 | 0.005 |
| 20 | 40 | 0.006 |
| 40 | 50 | 0.007 |
| Dimension | Dimension Tolerance | |
| over | or Less | |
| 2 | 6 | ±0.1 |
| 6 | 30 | ±0.2 |
| 30 | 120 | ±0.3 |
| 120 | 400 | ±0.5 |
| 400 | 1000 | ±0.8 |
| Type | Tolerance | [M] Material | [S] Surface Treatment | ||
| D | P·Q | ||||
| (1) | NSFRMHQ | h9 (Cold-drawn) | h7 | EN 1.1191 Equiv. | — |
| SFRMHQ | Black Oxide | ||||
| PSFRMHQ | Electroless Nickel Plating | ||||
| SSFRMHQ | EN 1.4301 Equiv. | — | |||
| (2) | NSFRMGQ | g6 | EN 1.1191 Equiv. | — | |
| SFRMGQ | Black Oxide | ||||
| PSFRMGQ | Electroless Nickel Plating | ||||
| SSFRMGQ | EN 1.4301 Equiv. | — | |||
| (3) | NSFRHQ | h7 (Ground) | h7 | EN 1.1191 Equiv. | — |
| SFRHQ | Black Oxide | ||||
| PSFRHQ | Electroless Nickel Plating | ||||
| SSFRHQ | EN 1.4301 Equiv. | — | |||
| (4) | NSFRQ | g6 (Ground) | g6 | EN 1.1191 Equiv. | — |
| SFRQ | Black Oxide | ||||
| PSFRQ | Electroless Nickel Plating | ||||
| SSFRQ | EN 1.4301 Equiv. | — | |||
| HFRQ | EN 1.7220 Equiv. [H]Hardness: 30 to 35HRC | Black Oxide | |||
| PHFRQ | Electroless Nickel Plating | ||||
| AHFRQ | High Hardness Stainless Steel Hardness: 35HRC or More | — | |||
Specification Table
| Part Number | — | L | — | F | — | P | — | T | — | Q | |
| (1) D Tol. h9 / P, Q Tol. h7 (3) h7 (Ground) (4) g6 (Ground) | SFRMHQ20 SFRHQ15 SFRQ30 | — — — | 325 150 400 | — — — | F25 F15 F28 | — — — | P10 P8 P20 | — — — | T25 T15 T28 | — — — | Q10 Q8 Q20 |
| Part Number | 0.1 mm Increments | 1 mm Increments | (Y) max. | |||
| Type | D | L | F·T | P·Q | ||
| (1) D Tol. h9 / P, Q Tol. h7 NSFRMHQ SFRMHQ PSFRMHQ SSFRMHQ (D13, 17, 18, or 22 is not available for SSFRMHQ) | (2) D Tol. h9 / P, Q Tol. g6 NSFRMGQ SFRMGQ PSFRMGQ SSFRMGQ (D13, 17, 18, or 22 is not available for SSFRMGQ) | 6 | 15.0 to 496.0 | 2 ≤ F ≤ P × 5 2 ≤ T ≤ Q × 5 | 3 4 5 | 500 |
| 8 | 15.0 to 496.0 | 3 ≤ P·Q < D | 500 | |||
| 10 | 15.0 to 796.0 | 800 | ||||
| 12 | 15.0 to 896.0 | 900 | ||||
| 13 | 15.0 to 896.0 | 4 ≤ P·Q < D | ||||
| 15 | 15.0 to 996.0 | 1000 | ||||
| 16 | 15.0 to 996.0 | |||||
| 17 | 24.0 to 996.0 | 5 ≤ P·Q < D | ||||
| 18 | 24.0 to 996.0 | |||||
| 20 | 24.0 to 996.0 | |||||
| 22 | 24.0 to 996.0 | 6 ≤ P·Q < D | ||||
| 25 | 24.0 to 996.0 | 8 ≤ P·Q < D | ||||
| 30 | 24.0 to 996.0 | |||||
| 35 | 40.0 to 996.0 | 16 ≤ P·Q < D | ||||
(3) h7 (Ground)
| Part Number | 0.1 mm Increments | 1 mm Increments | (Y) max. | ||
| Type | D | L | F·T | P·Q | |
| NSFRHQ SFRHQ PSFRHQ SSFRHQ | 6 | 15.0 to 496.0 | 2 ≤ F ≤ P × 5 2 ≤ T ≤ Q × 5 | 3 4 5 | 500 |
| 8 | 15.0 to 496.0 | 3 ≤ P·Q < D | 500 | ||
| 10 | 15.0 to 796.0 | 800 | |||
| 12 | 15.0 to 896.0 | 900 | |||
| 15 | 15.0 to 996.0 | 4 ≤ P·Q < D | 1000 | ||
| 17 | 24.0 to 996.0 | 5 ≤ P·Q < D | |||
| 20 | 24.0 to 996.0 | 1000 | |||
| 25 | 24.0 to 996.0 | 8 ≤ P·Q < D | |||
| 30 | 24.0 to 996.0 | ||||
| 35 | 40.0 to 996.0 | 16 ≤ P·Q < D | |||
| 40 | 40.0 to 996.0 | ||||
| 50 | 40.0 to 996.0 | ||||
(4) g6 (Ground)
| Part Number | 0.1 mm Increments | 1 mm Increments | (Y) max. | |||
| Type | D | L | F·T | P·Q | ||
| NSFRQ SFRQ PSFRQ SSFRQ * HFRQ (D15, 20, 25, 30, 35, 40, and 50 are available for HFRQ) * PHFRQ (D15, 20, 25, 30, 35, 40, and 50 are available for PHFRQ) AHFRQ (Only * marked sizes are available.) | * | 6 | 15.0 to 496.0 | 2 ≤ F ≤ P × 5 2 ≤ T ≤ Q × 5 AHFRQ only 2 ≤ F ≤ P × 4 2 ≤ T ≤ Q × 4 | 3 4 5 | 500 |
| * | 8 | 15.0 to 496.0 | 3 ≤ P·Q < D | 500 | ||
| * | 10 | 15.0 to 796.0 | 800 | |||
| * | 12 | 15.0 to 896.0 | 900 | |||
| 13 | 15.0 to 896.0 | 4 ≤ P·Q < D | ||||
| * | 15 | 15.0 to 996.0 | 1000 | |||
| * | 16 | 15.0 to 996.0 | ||||
| 17 | 24.0 to 996.0 | 5 ≤ P·Q < D | ||||
| 18 | 24.0 to 996.0 | |||||
| * | 20 | 24.0 to 996.0 | 1000 | |||
| 22 | 24.0 to 996.0 | 6 ≤ P·Q < D | ||||
| * | 25 | 24.0 to 996.0 | 8 ≤ P·Q < D | |||
| 30 | 24.0 to 996.0 | |||||
| 35 | 40.0 to 996.0 | 16 ≤ P·Q < D | ||||
| 40 | 40.0 to 996.0 | |||||
| 50 | 40.0 to 996.0 | |||||
For P and Q Dimensions 27, 31, 33, 34, 36, 37, 38, 39, 41, 42, 43, 44, 46, 47, 48, 49 cannot be specified.
[NG] For HFRQ and PHFRQ, D dimensions 35 to 50 are up to 800 in overall length (Y dimensions).
[NG] For AHFRQ, D dimensions 10 to 25 are up to 800 in overall length (Y dimension).
Alterations
| Alterations Code | Alteration Details | Applicable Conditions | Ordering Example | ||||||||||
| KC | Keyway at One Location | KC, A = 0.1 mm Increments [ ! ] When the keyway position is less than 1 mm away from the end face, [ NG ] Not applicable when Shaft Dia. ≤ ø5 | SFRMHQ30-300-F25-P10-T25-Q10-KC20-A10 | ||||||||||
| WKC | Keyways at Two Locations | WKC, C, K, E = 0.1 mm Increments [ ! ] When the keyway position is less than 1 mm away from the end face, [ NG ] Not applicable when Shaft Dia. ≤ ø5 | SFRMHQ30-300-F25-P10-T25-Q10-WKC5-C20-K5-E10 | ||||||||||
| KZ | Keyway (1 Location (for 4th Location)) | KZ, Z = 0.1 mm Increments [ ! ] When the keyway position is less than 1 mm away from the end face, [ ! ] Applicable only when combined with both KC and WKC | SFRMHQ30-300-F25-P10-T25-Q10-KC5-A10-WKC20-C10-K60-E10-KZ100-Z10 | ||||||||||
| PKC·QKC | Keyway on Step P (0 Point on the End Face) | PKC, QKC = 0.1 mm Increments [ ! ] Keyway Length ≤ 70 [ NG ] Not applicable when P ≤ 5 | SFRMHQ30-300-F25-P10-T25-Q10-PKC20.0 | ||||||||||
| PP·QQ | Keyway on Step P (Position Specification) | PP, PK = 0.1 mm Increments QQ, QK = 0.1 mm Increments [ ! ] Keyway Length ≤ 70 [ NG ] Not applicable when P ≤ 5 | SFRMHQ30-300-F25-P10-T25-Q10-PP10-PK10 | ||||||||||
| PV·QV | Multiple Keyways on Step P | PV, PW = 0.1 mm Increments QV, QW = 0.1 mm Increments [ ! ] Keyway Length ≤ 70 [ NG ] Not applicable when P ≤ 5 [ ! ] Applicable only when combined with PP or QQ | SFRMHQ30-300-F30-P10-T25-Q10-PP5-PK5-PV15-PW10 | ||||||||||
| TL·TR | Retaining Ring Groove on D Part | TL, TR = 0.1 mm Increments [ ! ]2 ≤ TL (TR) +F (T) ≤ 150 | SFRMHQ30-300-F25-P10-T25-Q10-TL5-TR5 | ||||||||||
| TF·TT | Retaining Ring Groove on Step | TF, TT = 0.1 mm Increments [ ! ]2 ≤ TF (TT) ≤ 150 | SFRMHQ30-300-F25-P10-T25-Q10-TF5 | ||||||||||
| FC | Set Screw Flat at One Location | FC, G = 1 mm Increments [ ! ]G ≤ 70 | SFRMHQ30-300-F25-P10-T25-Q10-FC10-G3 | ||||||||||
| WFC | Set Screw Flats at Two Locations | WFC, J, W, V = 1 mm Increments [ ! ]J·V ≤ 70 | SFRMHQ30-300-F25-P10-T25-Q10-WFC10-J15-W10-V20 | ||||||||||
| SFC | Set Screw Flat, 2 Set Screw Flats (Angle Specified) | SFC, SG = 1 mm Increments AG = 15° Increments [ ! ]SG ≤ 70 | SFRMHQ30-300-F25-P10-T25-Q10-SFC10-SG3-AG120 | ||||||||||
| PFC·QFC | Set Screw Flat on Step | PFC, LC = 1 mm Increments QFC, RC = 1 mm Increments [ ! ]LC·RC ≤ 70 | SFRMHQ30-300-F25-P10-T25-Q10-PFC5-LC10 | ||||||||||
| KWC | Set Screw Flat, 2 Set Screw Flats on Both Ends | KWC = 1 mm Increments [ ! ]KWC ≤ F·T [ ! ]Y ≤ 680 [NG] Not applicable to P (Q) = 4 or less | SFRMHQ30-300-F25-P10-T25-Q10-KWC25 | ||||||||||
| WC | Set Screw Flat, Chamfering Depth Configurable | WC = 0.1 mm Increments [NG] D dimensions 6, 13, 16, 17, 18, 22 are not available [ ! ] Only when KWC is specified, WC is available
| SFRMHQ30-300-F25-P20-T25-Q20-KWC25-WC18.0 | ||||||||||
| UC | Slit Cam Groove | UC = 1 mm Increments [ NG ] Not applicable when Shaft Dia. = ø2 or ø2.5 or when D ≥ 13 [NG] AHFRQ is not available | SFRMHQ10-300-F25-P8-T25-Q8-UC10 | ||||||||||
| LKC | L Dimension Tolerance Change | L < 500···L±0.05 L ≥ 500···L±0.1 [ NG ] Not applicable when L ≥ 800 | SFRMHQ30-300-F25-P10-T25-Q10-LKC | ||||||||||
| SC | Wrench Flats | SC = 1 mm Increments | SFRMHQ30-300-F25-P10-T25-Q10-SC10 | ||||||||||
| CKC | Concentricity | Change the concentricity to 0.02. [ NG ] Not applicable when D Tol. = h9 [NG] AHFRQ is not available [ ! ] For Lmax, see the table on the right
| SFRMHQ30-300-F25-P10-T25-Q10-CKC | ||||||||||
| CP·CQ | Change of Step Chamfering | Change the size of the chamfer on the step * Select CP and CQ from the table [ ! ] Only values provided on the Applicable Dia. Table are applicable
| SFRMHQ30-300-F25-P10-T25-Q10-CP4 | ||||||||||
| PM·QM | Addition of Tapped to Step | PM, QM = Selected from M2, 2.6, 3·4, 5, 6, 8, 10, 12, 24, 30 [ ! ] (P-PM)/2 ≥ 0.5 [ ! ] (P (Q)-PM (QM))/2 ≥ 0.5 | SFRMHQ30-300-F25-P10-T25-Q10-PM5-QM5 |
[ ! ] When multiple keyways or set screw flats are specified, they are added in the same plane. When the distance of the alterations are over 500 mm, ± 2 degree phase difference may occur.
Keyway Dimensions
|  | ||||||||||||||||||||||||||||||||||||||||||||||
[ ! ] If 3 keyways are required, use both KC and WKC.
[!] If 4 keyways are required, use KC, WKC, and KZ. (KZ is applicable only when combined with both KC and WKC)
[NG] Not applicable to D = 2 to 5.
[ ! ] The example below shows the keyway shape for the specs KC, WKC, K = 0, KC + A ≥ L and WKC + C + K + E > L.

[ ! ] When the keyway position is less than 1 mm away from the end face, R is not applied.

Detailed Retaining Ring Groove Dimensions for Rotary Shafts
|
| 
| |||||||||||||||||||||||||||||||||||||||||||||||||||||||||||||||||||||||||||||||||||||||||||||||||||||||||||||||||||||||||||||||||||||||
[ ! ] An applicable retaining ring is included in the retaining ring groove.
| D | Center Hardness (HRC) |
| 3 | 35 or More |
| 4 | 35 or More |
| 5 | 35 or More |
| 6 | 35 or More |
| 8 | 35 or More |
| 10 | 30 or More |
| 12 | 30 or More |
| 15 | 30 or More |
| 16 | 30 or More |
| 20 | 25 or More |
| 25 | 25 or More |
| Material | Tensile Strength (Mpa) | Yielding Point (0.2% Proof Stress) (MPa) | Young's Modulus (GPa) | Transverse Modulus (GPa) | Poisson Ratio |
| EN 1.1191 Equiv. | 570 or More | 345 or More | 200 or More | 77 or More | 0.3 |
| EN 1.4301 Equiv. | 520 or More | 210 or More | 193 or More | 74 or More | 0.3 |
| EN 1.7220 Equiv. | 930 or More | 785 or More | 206 or More | 79 or More | 0.3 |
| High Hardness Stainless Steel | 1102 | 715 | 199 | 77 | 0.3 |
High Hardness Stainless Steel Material Properties
(Unit: %)
| C | Si | Mn | P | S | Ni | Cr |
| 0.15-0.25 | ≤ 0.50 | 7.5-9.5 | ≤ 0.05 | ≥ 0.12 | 1.5-3.0 | 13-15 |
Part Number:
- In order to open the 3D preview, the part number must be fixed.
3D preview is not available, because the part number has not yet been determined.
Part Number
|
|---|
| SFRMHQ30-120-F65-P25-T65-Q25 |
| Part Number | Minimum order quantity | Volume Discount | RoHS | Material | Hardness | Surface Treatment | D Tolerance | Shaft Dia. D (mm) | Length L (mm) | P, Q Tolerance | F (mm) | FPC | P (mm) | Q (mm) | T (mm) | TPC | |
|---|---|---|---|---|---|---|---|---|---|---|---|---|---|---|---|---|---|
| 1 | 5 Days | 10 | [Steel] EN 1.1191 Equiv. | No Hardened | [Surface Treatment Provided] Black Oxide | h9 (Cold-drawn) | 30 | 120 | h7 | 65 | - | 25 | 25 | 65 | - |
Loading...
App. Example

Basic information
| Basic Shape | Both Ends Stepped | Environmentally friendly | RoHS Compliant (10 Substances) | End Shape (Left) | Straight |
|---|---|---|---|---|---|
| Characteristics/Applications | Not Applicable | End Shape (Right) | Straight | Keyway | Keyway Option (Alteration) |
| Cleaning Method | No Cleaning | Wrench Flats | Wrench flats option (alteration) |
Configure
Basic Attributes
-
Material
- Steel
- Stainless Steel
- Steel
-
Hardness
- No Hardened
- Hardened
-
Surface Treatment
- NA
- Surface Treatment Provided
-
D Tolerance
- h9 (Cold-drawn)
- h7 (Ground)
- g6 (Ground)
-
Shaft Dia. D(mm)
-
P, Q Tolerance
- g6
- h7
-
FPC
-
TPC
-
Type
- AHFRQ
- HFRQ
- NSFRHQ
- NSFRMGQ
- NSFRMHQ
- NSFRQ
- PHFRQ
- PSFRHQ
- PSFRMGQ
- PSFRMHQ
- PSFRQ
- SFRHQ
- SFRMGQ
- SFRMHQ
- SFRQ
- SSFRHQ
- SSFRMGQ
- SSFRMHQ
- SSFRQ
-
Length L(mm)
-
F(mm)
-
P(mm)
-
Q(mm)
-
T(mm)
-
Filter by CAD data type
- 2D
- 3D
Filter by standard shipping days
-
- All
- 4 Days or Less
- 5 Days or Less
- 6 Days or Less
- 9 Days or Less
Optional Attributes
- The specifications and dimensions of some parts may not be fully covered. For exact details, refer to manufacturer catalogs .
Complementary Products
Tech Support
- Technical Support
- Tel:+49 69 668173-0 / FAX:+49 69 668173-360
- Technical Inquiry


