ideanote
inCAD Library

Make sure to read this before use

What is inCAD Library?

  • Helpful application examples for mechanical engineers.

The Concept of inCAD Library

  • Online application library with a range of ideas for all manufacturing industries.
  • Save design time and learn new design applications when you are concepting new machines.

Disclaimer

  • MISUMI may not offer all parts in each application design. Available parts can only be purchased separately not as a unit shown in each application design.
  • MISUMI does not guarantee quality, accuracy, functionality, safety or reliability for the combination of the parts in each application example. Accept these points prior to use.
  • 2014 Copyright MISUMI
  • The data cannot be used for any purposes (including sales promotion) except for designing your machine.
  • All associated CAD is free. MISUMI reserves the right at its sole discretion to cancel, terminate or modify this offer.
  • MISUMI may change, add or delete application examples posted without prior notice.
  • MISUMI assumes no responsibilities for any damage incurred resulting from your use of the Service or any change, addition or deletion by MISUMI of the application examples for any reason whatsoever.

Features of inCAD Library

  1. Get great new design ideas for these application examples.
  2. Over 200 design application ideas collected from dozens of industries!

  3. Find application examples quickly! Search by function, workpiece shape, etc.

  4. Download the CAD models for each application example.
  5. Log in to download free CAD models.
    Download CAD for the entire application example!

Good IDEA! Button

Click the Good IDEA! Button when you like an application example!

*Can only be clicked once per application example.

  • Upper right corner on the page of application example details

  • Pop-up dialog for CAD data downloading

Back to top

inCAD Library Keyword Search
inCAD Library No. Search

No.000064 Destructive testing fixture

Destructive load and displacement can be measured in one test

Related Category

Manually Operated Unit

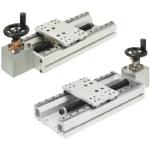
Product name Manually Operated Units/Handwheel Direction Configurable
Part number KUEF20-A-U-320
Features Allows to select the orientation of the handle freely, and thus, is suitable for use in limited spaces.
* Orange colored cells in the table below indicate the part numbers used in this example.

Selection criteria

Standard, off-the-shelf manual positioning unit

Back to page top

Risk info.

May come with unnecessary functions/features

Back to page top

Available sizes

■Manually operated unit (Handwheel direction configurable)

Frame Table Lead screw Nut for lead screw
Material EN AW-6063-T5 Equiv. EN AW-6063 Equiv. EN 1.1191 Equiv. Brass
Surface treatment Clear anodize Clear anodize Black oxide -
Nut bracket Side plate Bevel gear Cover
Material EN AW-5052 Equiv. EN AW-6063 Equiv. EN 1.1191 Equiv. EN 1.4301 Equiv.
Surface treatment Clear anodize Clear anodize - -

■Sizes and Dimensions

Handwheel type Handwheel direction Frame length (mm) Lead Effective stroke (mm)
Plastic handwheel
Plastic handwheel
Folding type
5-spoke type
Up
Down
Left
Right
170 4 53
220 103
320 203
370 253
420 303
470 353

Back to page top

Accuracy Info

■Accuracy of manually operated unit

Parallelism (mm) Backlash (mm)
0.15 0.5

Back to page top

Performance info.

■Speeds ・ Loads (load info.) of manually operated unit

Load capacity (N) Moment capacity (N・m)
Horizontal Vertical Pitching Yawing Rolling
490 98 14 14 27
Required torque (N・m) Required rotational force (N)
Horizontal Vertical Horizontal Vertical
0.059 0.420 2.261 16.164

Back to page top

Stopper Bolt with Bumpers

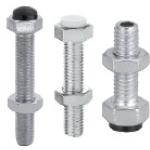
Product name Stopper Bolts with Bumpers/Standard/Straight Shape
Part number SUST10-70
* Orange colored cells in the table below indicate the part numbers used in this example.

Selection criteria

Stopper with soft tip that will not damage structural components

Back to page top

Available sizes

■Stopper bolt with urethane bumper, Shouldered, Standard Type

Stopper Bolt Accessory (Hex nut)
Material Hardness Material Strength classification Surface treatment Material Surface treatment
Urethane (Black) Shore A90 EN 1.7220 Equiv. 10.9 Bright chromate plating EN 1.0038 Equiv. Trivalent Chromate
EN 1.4301 Equiv. - - EN 1.4567 Equiv. -
Low rebound urethane (Gray) Shore A70 EN 1.7220 Equiv. 10.9 Bright chromate plating EN 1.0038 Equiv. Trivalent Chromate
Polyacetal (White) - EN 1.7220 Equiv. 10.9 Bright chromate plating EN 1.0038 Equiv. Trivalent Chromate
EN 1.4301 Equiv. - - EN 1.4567 Equiv. -
Silicon (Lt. Gray) Shore A70 EN 1.7220 Equiv. 10.9 Bright chromate plating EN 1.0038 Equiv. Trivalent Chromate
EN 1.4301 Equiv. - - EN 1.4567 Equiv. -

■Sizes and Dimensions

Screw DIA. M (Coarse) Length (mm)
M3 15 - 40 (5Increment)
M4 15 - 40 (5Increment)
M5 15 - 50 (5Increment)
M6 20 - 50 (5Increment), 60
M8 20 - 50 (5Increment), 60
M10 20 - 50 (5Increment), 60, 70
M12 30 - 70 (10Increment)

Back to page top

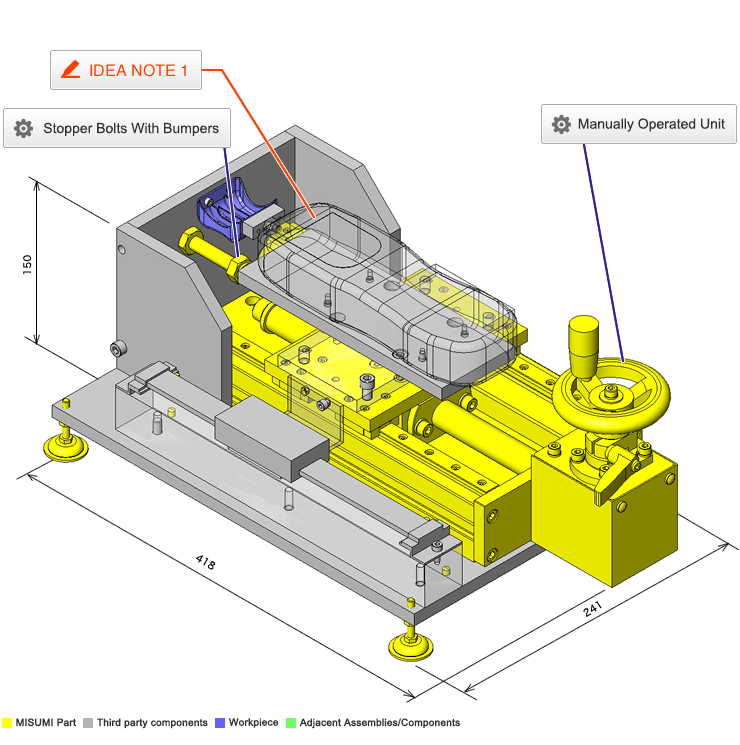
IDEA NOTE Tensile destructive load, Displacement measurement

Tensile destructive load and displacement measurements can be obtained with a push-pull gauge and a digital scale.
(Appearance of the crack implies that destructive load has been reached.)

  • TERMS AND CONDITIONS FOR USE OF CAD DATA
    Your access to the CAD data that MISUMI Corporation (hereinafter referred to as the Company) posts on this site (including 3D CAD data, intermediate 3D CAD data and 2D CAD data; hereinafter referred to as the Data) are of products manufactured and/or sold by the Company (hereinafter referred to as the Products) assumes that you have read and accepted these terms and conditions which govern your use of the Data. If you do not agree to these terms and conditions, you must stop using this website and the Data. You must not use the Data for any unlawful purpose or in any manner inconsistent with these terms and conditions.
    1. CAD Data
    The Data is prepared for assisting the Company's users in the CAD design process by providing dimensions and other Product information. In order to provide the best speed and stability working within this site, the Product drawings were simplified to reduce the size of the Data. For instance, some of the Products are shown without the oil groove shape, screws or spring shape. Also, please be aware that the tolerance, surface roughness and/or chamfer of the Data may vary from the actual Products.
    2. Disclaimer on Data
    While the Company has carefully prepared the Data, accuracy of the Data is not guaranteed and is subject to the variances as described above. The Company may also modify, add or delete the Data at any time without prior notice. The Company assumes no liability for any direct, indirect, consequential or special damages that you may claim resulted from your use of the Data or any changes to or deletions of the Data regardless of the reason. The Company provides no warranty as to the quality, accuracy, functionality, safety or reliability of the combination of Products and parts. Example applications and combinations of the Products are provided for illustrative purposes only.
    3. Copyright
    Copyrights to the content and the Data belong to the Company or the manufacturers of the Products. The said copyright is protected by the Copyright Act and international treaties. The use (including duplication, modification, uploading, posting, transmission, distribution, licensing, sales and publishing) of the Data except for the purpose to use the Data described above without prior approval of the Company is not allowed. The Data cannot be used for any purposes (including sales promotion) except for designing your machine. If you violate this provision or the laws or regulations, the Company may prohibit you from the use of the Data, the Company’s site and/or take legal action. So long as you comply with these terms and conditions, the Company grants to you a non-exclusive, non-transferable, revocable license to access and use the Data for the sole purpose of assisting you in designing machines that incorporate products.
    4. Disclaimer of Warranty
    ANY AND ALL CONTENT APPEARING ON THIS WEB SITE IS PROVIDED FOR INFORMATIONAL PURPOSES ONLY. THIS WEB SITE, ITS CONTENT AND ITS LINKS ARE PROVIDED ON AN "AS IS" AND "AS AVAILABLE" BASIS AND ARE USED ONLY AT YOUR SOLE RISK, TO THE FULLEST EXTENT PERMISSIBLE BY LAW. THE COMPANY DISCLAIMS ALL WARRANTIES, EXPRESS OR IMPLIED, OF ANY KIND, REGARDING THIS WEB SITE (INCLUDING ITS CONTENT, HARDWARE, SOFTWARE AND LINKS), INCLUDING AS TO FITNESS FOR A PARTICULAR PURPOSE, MERCHANTABILITY, TITLE, NON INFRINGEMENT, RESULTS, ACCURACY, COMPLETENESS, ACCESSIBILITY, COMPATIBILITY, SECURITY AND FREEDOM FROM COMPUTER VIRUS. THE COMPANY WILL NOT BE LIABLE FOR ANY DAMAGES OR LOSSES, INCLUDING DIRECT, INDIRECT, CONSEQUENTIAL, SPECIAL, INCIDENTAL OR PUNITIVE DAMAGES AND/OR LOST PROFITS, IN CONNECTION WITH USE OF THE INTERNET, THIS WEB SITE, ITS CONTENT OR ITS LINKS
    Further, the Company will not be liable to you for any failure or delay by the Company to provide access to the Data or any of its obligations under these terms and conditions where such failure or delay is the direct or indirect result of any circumstances beyond the Company's reasonable control (and the Company's obligations will be suspended for the duration of such circumstances).
    5. Policy of Third Parties
    You may be required to separately agree to third party's policies if you use third party software to create or browse the Data or use a third party’s CAD data. In this case, the Company does not assume any responsibility for defects of such CAD data or the software of the third party or violation of their rights. Understand them before use.

    CAD Data Download (Unit Assembly)

    CAD Data Download: File Format
    生成

    Thank you for downloading the data.

    Click the Good IDEA! button when this application example is helpful.


    This data is utilized in order to list more useful application examples in the future.

    Cautions on the CAD data

    1. Assembly data shows the assembly drawings in the concept design phase. The sole purpose of the data is to explain the structure and functionality of the assembly and is not considered nor to be used as a final design.
      You will need to edit the Data so that it meets your specific design conditions.
    2. The CAD data unit assembly consists of sub-assemblies.
      Each sub-assembly unit can be used as it is or can be edited.
    3. * The part in the frame is a sub-assembly unit.

    4. The Data for fabricated parts is based on easy-to-edit dimensions and shapes in sketches and histories.
    5. The Data including the third-part components are made by the Company.

    Back to top

  • * Unit assembly CAD data consists of some sub-assemblies.
       Each sub-assembly unit can be used as it is or can be edited.

Application Overview

Purpose

  • Measure loads and displacements during tensile destructive testing of workpieces.

Points for use

  • Handwheel manually operated mechanism.

Target workpiece

  • Molded plastic item
    External dims.: W40 x D34 x H20mm

Design Specifications

Operating Conditions or Design Requirements

  • External dimensions: W418 x D241 x H150mm
  • Manually operated unit effective stroke: 203mm
  • Push/pull gauge max. load: 100N
  • Digital scale measurement range: 200mm

Required Performance

  • Digital scale repeatability: 0.01mm
  • Manually operated unit allowable moment: 14N・m

Selection Criteria for Main Components

  • Push/pull gauge
    • Select type and size type that can withstand the destructive testing loads (Expansion and contraction of the gauge itself is very little thus negligible)
  • Digital scale
    • A scale compatible with stroke of the manually operated unit is selected.
  • Manually operated unit
    • Considering 100N max. load of push/pull operation, a unit that can withstand the allowable moment load is selected.
      (A clamp lever included with the unit is not used for the testing, thus it remains in released position)

Design Evaluation

Verification of main components

  • Select unit that can withstand the moment load from max. push/pull force applied during testing.
  • Manually operated unit
    • Determining the load moment on linear guide
    • When MA ≤ 17.6Nm
    • Satisfies the specification
    • MA = F x l
    • F = 100N
    • (Push/pull gauge max. load)
    • l = 0.073m
    • MA = 100 x 0.073 = 7.3 ≤ 17.6Nm

Other Design Consideration

  • In order to make load and displacement measurements with the handwheel easily viewable, a manually operated unit with an upward facing handwheel is selected.
  • The gauge plate position is adjusted with a stop pin in order to prevent push force to be applied to the workpiece.

Explore Similar Application Examples

Page - / -

Part List

No. Part Name Sample picture MISUMI Part Number
For Price and Days to ship click on Part No.
Quantity
1 Manually Operated Units KUEF20-A-U-320 1
2 Stopper Bolts SUST10-70 1
3 Leveling Mounts NFJNS5-30 4
4 Flat Head Cap Screws SFB3-5 4
5 Dowel Pins MSC5-10 2
6 Dowel Pins MSC4-15 2
7 Dowel Pins MSC4-10 2
  • The part list above contains only MISUMI parts.
    The list of parts and machined products of other manufacturers than MISUMI can also be downloaded by part list download (CSV).
  • TERMS AND CONDITIONS FOR USE OF CAD DATA
    Your access to the CAD data that MISUMI Corporation (hereinafter referred to as the Company) posts on this site (including 3D CAD data, intermediate 3D CAD data and 2D CAD data; hereinafter referred to as the Data) are of products manufactured and/or sold by the Company (hereinafter referred to as the Products) assumes that you have read and accepted these terms and conditions which govern your use of the Data. If you do not agree to these terms and conditions, you must stop using this website and the Data. You must not use the Data for any unlawful purpose or in any manner inconsistent with these terms and conditions.
    1. CAD Data
    The Data is prepared for assisting the Company's users in the CAD design process by providing dimensions and other Product information. In order to provide the best speed and stability working within this site, the Product drawings were simplified to reduce the size of the Data. For instance, some of the Products are shown without the oil groove shape, screws or spring shape. Also, please be aware that the tolerance, surface roughness and/or chamfer of the Data may vary from the actual Products.
    2. Disclaimer on Data
    While the Company has carefully prepared the Data, accuracy of the Data is not guaranteed and is subject to the variances as described above. The Company may also modify, add or delete the Data at any time without prior notice. The Company assumes no liability for any direct, indirect, consequential or special damages that you may claim resulted from your use of the Data or any changes to or deletions of the Data regardless of the reason. The Company provides no warranty as to the quality, accuracy, functionality, safety or reliability of the combination of Products and parts. Example applications and combinations of the Products are provided for illustrative purposes only.
    3. Copyright
    Copyrights to the content and the Data belong to the Company or the manufacturers of the Products. The said copyright is protected by the Copyright Act and international treaties. The use (including duplication, modification, uploading, posting, transmission, distribution, licensing, sales and publishing) of the Data except for the purpose to use the Data described above without prior approval of the Company is not allowed. The Data cannot be used for any purposes (including sales promotion) except for designing your machine. If you violate this provision or the laws or regulations, the Company may prohibit you from the use of the Data, the Company’s site and/or take legal action. So long as you comply with these terms and conditions, the Company grants to you a non-exclusive, non-transferable, revocable license to access and use the Data for the sole purpose of assisting you in designing machines that incorporate products.
    4. Disclaimer of Warranty
    ANY AND ALL CONTENT APPEARING ON THIS WEB SITE IS PROVIDED FOR INFORMATIONAL PURPOSES ONLY. THIS WEB SITE, ITS CONTENT AND ITS LINKS ARE PROVIDED ON AN "AS IS" AND "AS AVAILABLE" BASIS AND ARE USED ONLY AT YOUR SOLE RISK, TO THE FULLEST EXTENT PERMISSIBLE BY LAW. THE COMPANY DISCLAIMS ALL WARRANTIES, EXPRESS OR IMPLIED, OF ANY KIND, REGARDING THIS WEB SITE (INCLUDING ITS CONTENT, HARDWARE, SOFTWARE AND LINKS), INCLUDING AS TO FITNESS FOR A PARTICULAR PURPOSE, MERCHANTABILITY, TITLE, NON INFRINGEMENT, RESULTS, ACCURACY, COMPLETENESS, ACCESSIBILITY, COMPATIBILITY, SECURITY AND FREEDOM FROM COMPUTER VIRUS. THE COMPANY WILL NOT BE LIABLE FOR ANY DAMAGES OR LOSSES, INCLUDING DIRECT, INDIRECT, CONSEQUENTIAL, SPECIAL, INCIDENTAL OR PUNITIVE DAMAGES AND/OR LOST PROFITS, IN CONNECTION WITH USE OF THE INTERNET, THIS WEB SITE, ITS CONTENT OR ITS LINKS
    Further, the Company will not be liable to you for any failure or delay by the Company to provide access to the Data or any of its obligations under these terms and conditions where such failure or delay is the direct or indirect result of any circumstances beyond the Company's reasonable control (and the Company's obligations will be suspended for the duration of such circumstances).
    5. Policy of Third Parties
    You may be required to separately agree to third party's policies if you use third party software to create or browse the Data or use a third party’s CAD data. In this case, the Company does not assume any responsibility for defects of such CAD data or the software of the third party or violation of their rights. Understand them before use.

    CAD Data Download (Unit Assembly)

    CAD Data Download: File Format
    生成

    Thank you for downloading the data.

    Click the Good IDEA! button when this application example is helpful.


    This data is utilized in order to list more useful application examples in the future.

    Cautions on the CAD data

    1. Assembly data shows the assembly drawings in the concept design phase. The sole purpose of the data is to explain the structure and functionality of the assembly and is not considered nor to be used as a final design.
      You will need to edit the Data so that it meets your specific design conditions.
    2. The CAD data unit assembly consists of sub-assemblies.
      Each sub-assembly unit can be used as it is or can be edited.
    3. * The part in the frame is a sub-assembly unit.

    4. The Data for fabricated parts is based on easy-to-edit dimensions and shapes in sketches and histories.
    5. The Data including the third-part components are made by the Company.

    Back to top

Back to top