We are using cookies to offer a more comfortable experience in our online shop

For example, we can show you personalized product recommendations and offer the best possible service functions in the ordering process. You can manage your cookie settings under privacy policy regulations at any time.

ideanote
inCAD Library

Make sure to read this before use

What is inCAD Library?

  • Helpful application examples for mechanical engineers.

The Concept of inCAD Library

  • Online application library with a range of ideas for all manufacturing industries.
  • Save design time and learn new design applications when you are concepting new machines.

Disclaimer

  • MISUMI may not offer all parts in each application design. Available parts can only be purchased separately not as a unit shown in each application design.
  • MISUMI does not guarantee quality, accuracy, functionality, safety or reliability for the combination of the parts in each application example. Accept these points prior to use.
  • 2014 Copyright MISUMI
  • The data cannot be used for any purposes (including sales promotion) except for designing your machine.
  • All associated CAD is free. MISUMI reserves the right at its sole discretion to cancel, terminate or modify this offer.
  • MISUMI may change, add or delete application examples posted without prior notice.
  • MISUMI assumes no responsibilities for any damage incurred resulting from your use of the Service or any change, addition or deletion by MISUMI of the application examples for any reason whatsoever.

Features of inCAD Library

  1. Get great new design ideas for these application examples.
  2. Over 200 design application ideas collected from dozens of industries!

  3. Find application examples quickly! Search by function, workpiece shape, etc.

  4. Download the CAD models for each application example.
  5. Log in to download free CAD models.
    Download CAD for the entire application example!

Good IDEA! Button

Click the Good IDEA! Button when you like an application example!

*Can only be clicked once per application example.

  • Upper right corner on the page of application example details

  • Pop-up dialog for CAD data downloading

Back to top

inCAD Library Keyword Search
inCAD Library No. Search

No.000221 Simultaneous Clamping Mechanism Using Lever

Double-swing clamp driven by a single cylinder

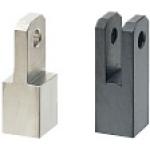
Knuckle Joints

Product name Knuckle Joints/Tapped/Configurable
Part number FNTM8-1.25-D8-B8-U15
Features Knuckle Joints - Tapped, Configurable - equipped with Rotation Stopper and compatible with M3~M26 screws regardless of Convex Type or Concave Type.
* Orange colored cells in the table below indicate the part numbers used in this example.

Selection criteria

Economical components effectively used as cylinder link mechanism parts

Available sizes

■Knuckle Joints - Tapped, Configurable

Convex Shaped Concave Shaped Material Surface Treatment
Standard Wide Type Bolt Fixing Type
EN 1.1191 Equiv. Black Oxide
- Electroless Nickel Plating
- EN 1.4301 Equiv. -

■Sizes and Dimensions

M-Pitch Hole Dia. (Selectable) B 1 mm Increment Overall Length A
Convex Type Concave Type
Standard Wide Type Bolt Fixing
Type
*3-0.5 3 4 5 3 ~ 10 3 ~ 5 6 ~ 10 6 ~ 10 L + 6
*4-0.7
*5-0.8 4 5 6 4 ~ 12 4 ~ 6 7 ~ 12 7 ~ 12
*6-1.0
 8-1.0 5 6 8 5 ~ 16 5 ~ 8 9 ~ 16 L + 8
*8-1.25 9 ~ 16
 10-1.25 6 8 10 6 ~ 20 6 ~ 10 11 ~ 20
*10-1.5 11 ~ 20
 12-1.25 8 10 12 13 8 ~ 22 8 ~ 11 12 ~ 22 - L + 10
 12-1.5
 14-1.5 10 12 13 14 15 16 10 ~ 25 10 ~ 13 14 ~ 25 L + 12
 16-1.5
 18-1.5 12 13 14 15 16 20 12 ~ 28 12 ~ 14 15 ~ 28 L + 14
 22-1.5 12 ~ 32 12 ~ 16 - L + 16
 26-1.5 12 ~ 38 12 ~ 18 L + 19

Only those sizes with * marks are available for Bolt Fixing Concave Type.

Back to page top

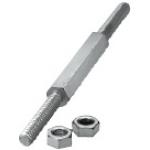
Rod End Coupling Rods

Product name Rod End Coupling Rods/Both Ends Threaded
Part number LBRFNF8-70-25
Features Rod End Coupling Rods with the right-hand/left-hand thread selectable in size and length.
* Orange colored cells in the table below indicate the part numbers used in this example.

Selection criteria

Economical components effective for using as cylinder link mechanism parts

Available sizes

■Rod End Coupling Rods - Both Ends Threaded

Material Surface Treatment Accessory (one hex nut for right / left-hand thread)
Material Surface Treatment
EN 1.1191 Equiv. Black Oxide EN 1.1191 Equiv. Trivalent Chromate
Electroless Nickel Plating
EN 1.4301 Equiv. - EN 1.4301 Equiv. -

■Sizes and Dimensions

Screw Dia.
(Coarse)
Overall Length Thread Length
(Under Head)
Wrench Flats
3 19-300 5-15 6
4 22-400 6-20 7
5 25-600 7-25 8
6 32-600 9-30 10
8 38-1000 12-40 13
10 44-1000 15-50 17
12 54-1000 18-60 19
14 60-1000 21-70 21
16 66-1000 24-80 24
18 72-1000 27-90 27
20 85-1000 30-100 30
22 91-1000 33-110 32

Back to page top

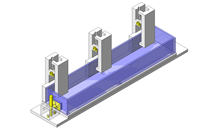
IDEA NOTE A single actuator opens/closes two levers (links).

Fine adjustments can be achieved by utilizing the adjusting screw and rod end coupling.

IDEA NOTE Fine positioning adjustment

By utilizing the adjusting screw and rod end coupling, fine adjustment can be achieved.

  • TERMS AND CONDITIONS FOR USE OF CAD DATA
    Your access to the CAD data that MISUMI Corporation (hereinafter referred to as the Company) posts on this site (including 3D CAD data, intermediate 3D CAD data and 2D CAD data; hereinafter referred to as the Data) are of products manufactured and/or sold by the Company (hereinafter referred to as the Products) assumes that you have read and accepted these terms and conditions which govern your use of the Data. If you do not agree to these terms and conditions, you must stop using this website and the Data. You must not use the Data for any unlawful purpose or in any manner inconsistent with these terms and conditions.
    1. CAD Data
    The Data is prepared for assisting the Company's users in the CAD design process by providing dimensions and other Product information. In order to provide the best speed and stability working within this site, the Product drawings were simplified to reduce the size of the Data. For instance, some of the Products are shown without the oil groove shape, screws or spring shape. Also, please be aware that the tolerance, surface roughness and/or chamfer of the Data may vary from the actual Products.
    2. Disclaimer on Data
    While the Company has carefully prepared the Data, accuracy of the Data is not guaranteed and is subject to the variances as described above. The Company may also modify, add or delete the Data at any time without prior notice. The Company assumes no liability for any direct, indirect, consequential or special damages that you may claim resulted from your use of the Data or any changes to or deletions of the Data regardless of the reason. The Company provides no warranty as to the quality, accuracy, functionality, safety or reliability of the combination of Products and parts. Example applications and combinations of the Products are provided for illustrative purposes only.
    3. Copyright
    Copyrights to the content and the Data belong to the Company or the manufacturers of the Products. The said copyright is protected by the Copyright Act and international treaties. The use (including duplication, modification, uploading, posting, transmission, distribution, licensing, sales and publishing) of the Data except for the purpose to use the Data described above without prior approval of the Company is not allowed. The Data cannot be used for any purposes (including sales promotion) except for designing your machine. If you violate this provision or the laws or regulations, the Company may prohibit you from the use of the Data, the Company’s site and/or take legal action. So long as you comply with these terms and conditions, the Company grants to you a non-exclusive, non-transferable, revocable license to access and use the Data for the sole purpose of assisting you in designing machines that incorporate products.
    4. Disclaimer of Warranty
    ANY AND ALL CONTENT APPEARING ON THIS WEB SITE IS PROVIDED FOR INFORMATIONAL PURPOSES ONLY. THIS WEB SITE, ITS CONTENT AND ITS LINKS ARE PROVIDED ON AN "AS IS" AND "AS AVAILABLE" BASIS AND ARE USED ONLY AT YOUR SOLE RISK, TO THE FULLEST EXTENT PERMISSIBLE BY LAW. THE COMPANY DISCLAIMS ALL WARRANTIES, EXPRESS OR IMPLIED, OF ANY KIND, REGARDING THIS WEB SITE (INCLUDING ITS CONTENT, HARDWARE, SOFTWARE AND LINKS), INCLUDING AS TO FITNESS FOR A PARTICULAR PURPOSE, MERCHANTABILITY, TITLE, NON INFRINGEMENT, RESULTS, ACCURACY, COMPLETENESS, ACCESSIBILITY, COMPATIBILITY, SECURITY AND FREEDOM FROM COMPUTER VIRUS. THE COMPANY WILL NOT BE LIABLE FOR ANY DAMAGES OR LOSSES, INCLUDING DIRECT, INDIRECT, CONSEQUENTIAL, SPECIAL, INCIDENTAL OR PUNITIVE DAMAGES AND/OR LOST PROFITS, IN CONNECTION WITH USE OF THE INTERNET, THIS WEB SITE, ITS CONTENT OR ITS LINKS
    Further, the Company will not be liable to you for any failure or delay by the Company to provide access to the Data or any of its obligations under these terms and conditions where such failure or delay is the direct or indirect result of any circumstances beyond the Company's reasonable control (and the Company's obligations will be suspended for the duration of such circumstances).
    5. Policy of Third Parties
    You may be required to separately agree to third party's policies if you use third party software to create or browse the Data or use a third party’s CAD data. In this case, the Company does not assume any responsibility for defects of such CAD data or the software of the third party or violation of their rights. Understand them before use.

    CAD Data Download (Unit Assembly)

    CAD Data Download: File Format
    生成

    Thank you for downloading the data.

    Click the Good IDEA! button when this application example is helpful.


    This data is utilized in order to list more useful application examples in the future.

    Cautions on the CAD data

    1. Assembly data shows the assembly drawings in the concept design phase. The sole purpose of the data is to explain the structure and functionality of the assembly and is not considered nor to be used as a final design.
      You will need to edit the Data so that it meets your specific design conditions.
    2. The CAD data unit assembly consists of sub-assemblies.
      Each sub-assembly unit can be used as it is or can be edited.
    3. * The part in the frame is a sub-assembly unit.

    4. The Data for fabricated parts is based on easy-to-edit dimensions and shapes in sketches and histories.
    5. The Data including the third-part components are made by the Company.

    Back to top

  • * Unit assembly CAD data consists of some sub-assemblies.
       Each sub-assembly unit can be used as it is or can be edited.

Application Overview

Purpose

  • Purpose
    • Clamping on a pipe for cutting.
  • Operation
    • As the cylinder pulls the lever, the clamp opens and a pipe can be inserted. As the cylinder pushes the lever, the clamp closes and grips the pipe.

Target workpiece

  • Shape: resin pipe
  • Size: Ø30 x L4000mm
  • Weight: 0.2kg

Design Specifications

Operating Conditions or Design Requirements

  • Outer dimensions: W420 x D420 x H90mm
  • Cylinder stroke: 20mm

Required Performance

  • Gripping force: 200N or above

Selection Criteria for Main Components

  • An air cylinder is selected based on the required gripping force and lever ratio.

Design Evaluation

Verification of main components

  • The cylinder thrust and link mechanism are verified to see whether they have the required clamping force.
    • (confirmation of positioning cylinder thrust)
    • Conditional value: angle θ = sin⁻¹(12.5mm/125mm) = 5.74°, operating air pressure 0.5MPa, efficiency 0.8
    • Cylinder theoretical thrust:118N
    • From thrust determined by lever angle F = cylinder thrust x efficiency x cos(cylinder thrust angle), F = 118 x 0.8 x cos 5.74° = 93.9N
    • (Confirmation of clamping (gripping) force)
    • Conditional value: distance from link rotation center to rod A: La = 50mm, distance from link rotation center to cylinder rod: Ls = 125mm
    • Confirmation of clamping (gripping) force. If we put Fs as force by cylinder, from the balance of moment of link, force of rod A Fa = Fs x (Ls/La), hence,
      Fa = 93.9 x (125/50) = 234.75N
      The force of rod A in clamping direction F is F = Fa x cosθ, hence,
      F = 234.75 x cos5.74° = 233.57N
      -> The condition (clamping force ≥ 200 (N)) is satisfied.

Other Design Consideration

  • The position of the lever (link) fulcrum should be considered so that the clamp can be opened and closed.
  • A mechanism should be equipped to enable center position adjustment of the workpiece.

Explore Similar Application Examples

Page - / -

Part List

No. Part Name Sample picture MISUMI Part Number
For Price and Days to ship click on Part No.
Quantity
1 Precision Pivot Pins CDG12-22 3
2 Precision Pivot Pins CDG8-16 5
3 Hinge Pins CCGH8-19 1
4 Knuckle Joint FNTM8-1.25-D8-B8-U15 2
5 Knuckle Joint FNTM8-1.0-D8-B8-U15 1
6 Rod End Coupling Rods LBRFNF8-70-25 1
7 Rod End Coupling Rods LBRFNF8-140-25 1
8 Screw Stopper ANBN8-25 1
9 One-Touch Fittings MSSB8-2 1
10 Air Nozzles ARDP1.0-6 1
  • The part list above contains only MISUMI parts.
    The list of parts and machined products of other manufacturers than MISUMI can also be downloaded by part list download (CSV).
  • TERMS AND CONDITIONS FOR USE OF CAD DATA
    Your access to the CAD data that MISUMI Corporation (hereinafter referred to as the Company) posts on this site (including 3D CAD data, intermediate 3D CAD data and 2D CAD data; hereinafter referred to as the Data) are of products manufactured and/or sold by the Company (hereinafter referred to as the Products) assumes that you have read and accepted these terms and conditions which govern your use of the Data. If you do not agree to these terms and conditions, you must stop using this website and the Data. You must not use the Data for any unlawful purpose or in any manner inconsistent with these terms and conditions.
    1. CAD Data
    The Data is prepared for assisting the Company's users in the CAD design process by providing dimensions and other Product information. In order to provide the best speed and stability working within this site, the Product drawings were simplified to reduce the size of the Data. For instance, some of the Products are shown without the oil groove shape, screws or spring shape. Also, please be aware that the tolerance, surface roughness and/or chamfer of the Data may vary from the actual Products.
    2. Disclaimer on Data
    While the Company has carefully prepared the Data, accuracy of the Data is not guaranteed and is subject to the variances as described above. The Company may also modify, add or delete the Data at any time without prior notice. The Company assumes no liability for any direct, indirect, consequential or special damages that you may claim resulted from your use of the Data or any changes to or deletions of the Data regardless of the reason. The Company provides no warranty as to the quality, accuracy, functionality, safety or reliability of the combination of Products and parts. Example applications and combinations of the Products are provided for illustrative purposes only.
    3. Copyright
    Copyrights to the content and the Data belong to the Company or the manufacturers of the Products. The said copyright is protected by the Copyright Act and international treaties. The use (including duplication, modification, uploading, posting, transmission, distribution, licensing, sales and publishing) of the Data except for the purpose to use the Data described above without prior approval of the Company is not allowed. The Data cannot be used for any purposes (including sales promotion) except for designing your machine. If you violate this provision or the laws or regulations, the Company may prohibit you from the use of the Data, the Company’s site and/or take legal action. So long as you comply with these terms and conditions, the Company grants to you a non-exclusive, non-transferable, revocable license to access and use the Data for the sole purpose of assisting you in designing machines that incorporate products.
    4. Disclaimer of Warranty
    ANY AND ALL CONTENT APPEARING ON THIS WEB SITE IS PROVIDED FOR INFORMATIONAL PURPOSES ONLY. THIS WEB SITE, ITS CONTENT AND ITS LINKS ARE PROVIDED ON AN "AS IS" AND "AS AVAILABLE" BASIS AND ARE USED ONLY AT YOUR SOLE RISK, TO THE FULLEST EXTENT PERMISSIBLE BY LAW. THE COMPANY DISCLAIMS ALL WARRANTIES, EXPRESS OR IMPLIED, OF ANY KIND, REGARDING THIS WEB SITE (INCLUDING ITS CONTENT, HARDWARE, SOFTWARE AND LINKS), INCLUDING AS TO FITNESS FOR A PARTICULAR PURPOSE, MERCHANTABILITY, TITLE, NON INFRINGEMENT, RESULTS, ACCURACY, COMPLETENESS, ACCESSIBILITY, COMPATIBILITY, SECURITY AND FREEDOM FROM COMPUTER VIRUS. THE COMPANY WILL NOT BE LIABLE FOR ANY DAMAGES OR LOSSES, INCLUDING DIRECT, INDIRECT, CONSEQUENTIAL, SPECIAL, INCIDENTAL OR PUNITIVE DAMAGES AND/OR LOST PROFITS, IN CONNECTION WITH USE OF THE INTERNET, THIS WEB SITE, ITS CONTENT OR ITS LINKS
    Further, the Company will not be liable to you for any failure or delay by the Company to provide access to the Data or any of its obligations under these terms and conditions where such failure or delay is the direct or indirect result of any circumstances beyond the Company's reasonable control (and the Company's obligations will be suspended for the duration of such circumstances).
    5. Policy of Third Parties
    You may be required to separately agree to third party's policies if you use third party software to create or browse the Data or use a third party’s CAD data. In this case, the Company does not assume any responsibility for defects of such CAD data or the software of the third party or violation of their rights. Understand them before use.

    CAD Data Download (Unit Assembly)

    CAD Data Download: File Format
    生成

    Thank you for downloading the data.

    Click the Good IDEA! button when this application example is helpful.


    This data is utilized in order to list more useful application examples in the future.

    Cautions on the CAD data

    1. Assembly data shows the assembly drawings in the concept design phase. The sole purpose of the data is to explain the structure and functionality of the assembly and is not considered nor to be used as a final design.
      You will need to edit the Data so that it meets your specific design conditions.
    2. The CAD data unit assembly consists of sub-assemblies.
      Each sub-assembly unit can be used as it is or can be edited.
    3. * The part in the frame is a sub-assembly unit.

    4. The Data for fabricated parts is based on easy-to-edit dimensions and shapes in sketches and histories.
    5. The Data including the third-part components are made by the Company.

    Back to top

Back to top