ideanote
inCAD Library

Make sure to read this before use

What is inCAD Library?

  • Helpful application examples for mechanical engineers.

The Concept of inCAD Library

  • Online application library with a range of ideas for all manufacturing industries.
  • Save design time and learn new design applications when you are concepting new machines.

Disclaimer

  • MISUMI may not offer all parts in each application design. Available parts can only be purchased separately not as a unit shown in each application design.
  • MISUMI does not guarantee quality, accuracy, functionality, safety or reliability for the combination of the parts in each application example. Accept these points prior to use.
  • 2014 Copyright MISUMI
  • The data cannot be used for any purposes (including sales promotion) except for designing your machine.
  • All associated CAD is free. MISUMI reserves the right at its sole discretion to cancel, terminate or modify this offer.
  • MISUMI may change, add or delete application examples posted without prior notice.
  • MISUMI assumes no responsibilities for any damage incurred resulting from your use of the Service or any change, addition or deletion by MISUMI of the application examples for any reason whatsoever.

Features of inCAD Library

  1. Get great new design ideas for these application examples.
  2. Over 200 design application ideas collected from dozens of industries!

  3. Find application examples quickly! Search by function, workpiece shape, etc.

  4. Download the CAD models for each application example.
  5. Log in to download free CAD models.
    Download CAD for the entire application example!

Good IDEA! Button

Click the Good IDEA! Button when you like an application example!

*Can only be clicked once per application example.

  • Upper right corner on the page of application example details

  • Pop-up dialog for CAD data downloading

Back to top

inCAD Library Keyword Search
inCAD Library No. Search

No.000111 Z-axis elevating mechanism

An elevating mechanism with slant mounted linear guide

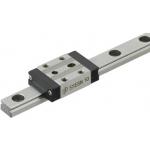
Linear Guide

Product name Miniature Linear Guides/Standard Block with Dowel Holes
Part number SSE2BNZ13-145
Features Dowel Hole facilitates positioning of Parts Mounted on Blocks
* Orange colored cells in the table below indicate the part numbers used in this example.

Selection criteria

Effective as a linear motion system to move the table up / down by diagonally mounting.

Back to page top

Available sizes

■Miniature linear guide (Standard block with dowel holes, Slight clearance, Standard grade)

Material Hardness
EN 1.4125 Equiv. 56HRC -
Carbon steel 58HRC -

■Sizes and Dimensions

Number of blocks Block Overall height Rail
length
Dowel hole
Width Length DIA. Depth
1 17 23.6 8 40 - 130 Ø3 2
20 30 10 35 - 275 2.5
27 33.9 13 45 - 470 3
32 42.4 16 70 - 670 4
40 50 20 100 - 700 4
2 17 23.6 x 2pcs. 8 70 - 130 2
20 30 x 2pcs. 10 95 - 275 2.5
27 33.9 x 2pcs. 13 120 - 470 3
32 42.4 x 2pcs. 16 150 - 670 4
40 50 x 2pcs. 20 160 - 700 4

* Please see the product pages for details of selectable sizes.

Back to page top

Selection steps

■Miniature linear guide selection steps

Determine application conditions
(Moving mass, feed rate, motion pattern, life)

Temporary selection of linear guide specifications
(Block type, overall height, rail length are
temporarily selected.)

Confirm of basic safety
  • ●Allowable load
  • ●Life
  • ●Preload

Back to page top

Accuracy Info

■Preload and accuracy standards (Standard block with dowel holes, Slight clearance, Standard grade)

(µm)

Radial clearance 0 ~ +15
Tolerance of dims. H ±20
Pair variation of H 40
Tolerance of dims. W2 ±25
Pair variation of W2 40

(µm)

Rail length (mm)
- 80 81 - 200 201 - 250 251 - 400 401 - 500 501 - 630 631 - 700
Running parallelism 13 15 17 18 19 21 21.5

Back to page top

Performance info.

■Load capacity of linear guide (Standard block with dowel holes, Slight clearance, Standard grade)

Overall height Basic load rating Allowable static moment
C (Dynamic) kN Co (Static) kN MA
N・m
MB
N・m
Mc
N・m
8 0.9 1.5 4.1 4.1 5.2
10 1.5 2.5 5.1 5.1 10.2
13 2.2 3.3 8.8 9.5 16.1
16 3.6 5.4 21.6 23.4 39.6
20 5.2 8.5 48.4 48.4 86.4

Back to page top

Technical calculations

■Linear guide life calculations

●Life
When the linear system is in motion with applied load, the rolling surfaces and races are subject to repeated stress. This stress can cause scale-like flaking due to material fatigue. The total run distance until the flaking appears is the "Life" of the linear system.
●Rated life
Rated life is a total distance 90% of linear guides reach without flaking when a group of the same guides are run under the same condition. The rated life can be calculated with basic dynamic load rating and the load applied on the guides as follows.
When using linear guides, load calculations are initially needed. It is not easy to calculate the loads during linear motion due to vibrations and shocks, as well as load distribution on the guides. Furthermore, operating environment temperature has large effect on life. When these conditions are taken in consideration, the calculations would be as follows.
  • L: Rated life (km)
  • fH: Hardness factor (see Fig-1)
  • fT: Temperature factor (see Fig-2)
  • fC: Contact factor (see Table-1)
  • fW: Load factor (see Table-2)
  • C: Basic dynamic load rating (N)
  • P: Applicable load (N)
●Hardness factor (fH)

In using linear guides, the shaft that balls contact must have sufficient hardness, If adequate hardness cannot be obtained, load rating decreases and life will be reduced as a result.
Please compensate the life value with the hardness factor.

●Temperature factor (fT)

When the temperature of linear guides exceed 100°C, hardness of blocks and rails will be reduced, causing reduction of life. Please compensate the life rating with temperature factor.
* Please use linear guides within the resistant temperature range on product pages.

●Contact factor (fC)

Table-1. Contact factor

Number of blocks installed on one rail and contact factor fC

1 1.00
2 0.81
3 0.72
4 0.66
5 0.61

In general, it is common to use 2 or more blocks on 1 rail. In such case, load applicable on each block would not be uniform due to machining variations. As the result, allowable load rating on each block would vary depending on the number of blocks used per rail. Please compensate the life rating with contact factor shown on Table-1.

●Load factor (fW)

Table-2. Load factor

App.condition fw
No external shocks or vibrations and
speed is low 15m/min or less
1.0 - 1.5
No significant shocks or vibration and
med. speed 60m/min or less
1.5 - 20
External shocks and vibrations exist
and the speed is high 60m/min or over
2.0 - 3.5

When calculating loads applicable on linear guides, other than the weight of the object, inertial force due to motion speeds, moment loads, and variations of each over time must also be obtained accurately. However, accurate calculation would be difficult due to repeated starts and stops and various shocks and vibrations. Therefore, the Load Factors shown in Table-2 are used to simplify the life calculations.

●Applicable load calculation method
When moment loads apply a block, use the following formula to convert the moment load to applicable load.
  • P: Applicable load (N)
  • F: Downward load (N)
  • Co: Static load rating (N)
  • MA: Allowable static moment - Pitching direction (N・m)
  • MC: Allowable static moment - Rolling direction (N・m)
  • Lp: Load point distance (m) in pitching direction
  • Lr: Load point distance (m) in rolling direction

Back to page top

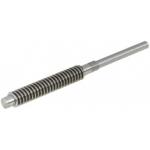
Lead Screw

Product name Lead Screws For Support Units
Part number MTSWK14-240-S70-RC-FE13-FW6-FY1
Features A dedicated lead screw configured for bearings, stopper clamp, and a position indicator
* Orange colored cells in the table below indicate the part numbers used in this example.

Selection criteria

Effective as a motion transmission device to move the tale, etc.

Back to page top

Available sizes

■Lead screw support unit

Lead screw Compatible lead screw nut
Type Material Surface treatment Type Material
Right hand thread

Lent hand thread
EN 1.1191 Equiv. - Right hand thread

Lent hand thread
Brass
Black oxide
Low temperature black chrome plating
EN 1.4305 Equiv. -

■Sizes and Dimensions

Screw shaft nominal DIA. Pitch Overall length Applicable bearing Handle mounting shaft
1mm increment I.D. Width DIA. Length
12 2 80 ~ 1000 Ø8 ≤7 Ø6 2 ~ 80
14 3 Ø10 ≤8 Ø8
16 100 ~ 1200 Ø12 ≤8 Ø10 2 ~ 95
18 4 150 ~ 1200
20 Ø15 ≤9 Ø12 2 ~ 100
22 5
25

* Manufacturable ranges vary slightly depending on material, screw shaft nominal DIA. Please see the product pages for details.

Back to page top

Accuracy Info

■Lead screw: Screw shaft runout tolerance (Max.)

(mm)

Screw shaft
nominal
Screw shaft length
- 125 126
- 200
201
- 315
316
- 400
401
- 500
501
- 630
631
- 800
801
- 1000
1001 - 1200
12 0.09 0.12 0.16 0.21 0.27 0.35 0.46 0.58 -
14 0.09 0.11 0.13 0.16 0.2 0.25 0.32 0.42 -
16 0.09 0.11 0.13 0.16 0.2 0.25 0.32 0.42 0.55
18 - 20 - 0.11 0.13 0.16 0.2 0.25 0.32 0.42 0.55
22 - 25 - 0.09 0.11 0.13 0.16 0.19 0.23 0.3 0.38

■Lead screw accuracy standards

Item Value
Allowable dimension limit and tolerances JISB0217 0218
Screw accuracy 7e Class
Nut accuracy 7H Class
Single pitch error ±0.02
Cumulative pitch error ±0.15 / 300mm
Length tolerance JISB0405 (Medium class)
Screw shaft end DIA. tolerance h7

■Shaft end DIA. tolerance

Bearing shaft DIA. Shaft end DIA. Tolerance
Ø8 Ø5 +0.075 / 0
Ø10 Ø9.6 0 / -0.09
Ø12 Ø11.5 0 / -0.11
Ø15 Ø14.3

Back to page top

Technical calculations

■Lead screw・Lead screw nut selection steps

In order to verify contact surface pressure and sliding speed not to cause abnormal wear on the lead screw nut, obtain surface contact pressure P and sliding speed V.
Plot the calculated P and V values against the PV value graph and confirm the intersection.
If the intersection falls inside of line (1) and (2), it is determined that abnormal wear would not occur.

Determining of usage conditions

Lead screw ・ lead screw nut temporary selection

(1) Contact surface pressure P, (2)Sliding speed V calculations
Verify that the value is within (1) and (2)of the PV value graph

Calculate screw efficiency η and load torque T.

(Axial load, rotational speed)


(Lead screw・lead screw nut material)

(If not good)

PV Value graph

  • (1) Steel (lubricated) - Brass
  • (2) Steel (unlubricated) - Resin
PV Value graph

(1) Contact surface pressure P (N/mm²)

接触面圧P
  • Fs: Shaft axial load (N)
  • F0: Allowable dynamic thrust (N) → From lead screw nut specifications
    Thrust when contact surface pressure of the lead screw and nut becomes 9.8 (N/mm²).
  • α: 9.8(Brass) 0.98(Resin)

(2) Sliding speed V (m/min)

すべり速度V
  • d2: Screw shaft effective DIA. → From lead screw specifications table
  • d: Screw shaft lead angle (deg.) → From lead screw specifications table
  • n: Screw shaft rotation per minute (nim-1)

(3) Screw efficiency η

ねじ効率η
  • µ: dynamic friction coefficient
  • d: Screw shaft lead angle (deg.)

Screw shaft Lead screw nut Dynamic friction coefficient µ
Steel (Lubricated) Brass 0.21
Steel (Unlubricated) Polyacetal /
sliding PPS resin
0.13

(4) Load torque (N・cm)

負荷トルク
  • Fs: Shaft axial load
  • η: Screw efficiency
  • R: Lead (cm)

Back to page top

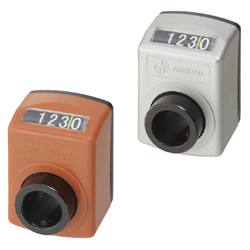
Digital Position Indicator

Product name Digital Positioning Indicators/Standard Splindle
Part number DSNR3-CSE8
Features Compact indicators can be mounted without occupying much space. Can be selected from 4 digit or 5 digit types.
* Orange colored cells in the table below indicate the part numbers used in this example.

Selection criteria

Effective as a counter mountable without taking up a large space.

Back to page top

Available sizes

■Compact digital position indicator (Standard, Compact type)

Cover Displayed
digits
Rotation
direction
Back plate Sleeve Accessory
Material Color Material Material Surface treatment Set screw Cushion sheet
Nylon Orange 4 digits ・ 5 digits Right ・ Left Polyphenylene ether EN 1.0736 Equiv. Black
oxide
EN 1.7220 Equiv. Polyethylene foam
(Black)
Silver 4 digits (Black)

■Specifications and Dimensions

Spindle pitch Count increment per revolution Max. rotational speed Applicable shaft DIA. Reference dimension
4 digits 5 digits (rpm) Depth Overall width Overall height
2 0002.0 00002.0 150 Ø6
Ø8
Ø10
Ø12
Ø14
(33) 33 47
3 0003.0 00003.0 100
4 0004.0 00004.0 75
5 0005.0 00005.0 60
6 0006.0 00006.0 50

Back to page top

IDEA NOTE Linear guide slant application

In order to minimize the equipment height and make manually operated handle rotation light, the linear guide is mounted diagonally and a wedge function is achieved.

IDEA NOTE Diagonally mounted linear guides are in rail moving configuration to secure the block spacing.

The rail of the linear guide is made to move to enable wide block spacing placed horizontally.

IDEA NOTE Horizontal leveling

There are 3 leveling bolts to level the engraving surface.

  • TERMS AND CONDITIONS FOR USE OF CAD DATA
    Your access to the CAD data that MISUMI Corporation (hereinafter referred to as the Company) posts on this site (including 3D CAD data, intermediate 3D CAD data and 2D CAD data; hereinafter referred to as the Data) are of products manufactured and/or sold by the Company (hereinafter referred to as the Products) assumes that you have read and accepted these terms and conditions which govern your use of the Data. If you do not agree to these terms and conditions, you must stop using this website and the Data. You must not use the Data for any unlawful purpose or in any manner inconsistent with these terms and conditions.
    1. CAD Data
    The Data is prepared for assisting the Company's users in the CAD design process by providing dimensions and other Product information. In order to provide the best speed and stability working within this site, the Product drawings were simplified to reduce the size of the Data. For instance, some of the Products are shown without the oil groove shape, screws or spring shape. Also, please be aware that the tolerance, surface roughness and/or chamfer of the Data may vary from the actual Products.
    2. Disclaimer on Data
    While the Company has carefully prepared the Data, accuracy of the Data is not guaranteed and is subject to the variances as described above. The Company may also modify, add or delete the Data at any time without prior notice. The Company assumes no liability for any direct, indirect, consequential or special damages that you may claim resulted from your use of the Data or any changes to or deletions of the Data regardless of the reason. The Company provides no warranty as to the quality, accuracy, functionality, safety or reliability of the combination of Products and parts. Example applications and combinations of the Products are provided for illustrative purposes only.
    3. Copyright
    Copyrights to the content and the Data belong to the Company or the manufacturers of the Products. The said copyright is protected by the Copyright Act and international treaties. The use (including duplication, modification, uploading, posting, transmission, distribution, licensing, sales and publishing) of the Data except for the purpose to use the Data described above without prior approval of the Company is not allowed. The Data cannot be used for any purposes (including sales promotion) except for designing your machine. If you violate this provision or the laws or regulations, the Company may prohibit you from the use of the Data, the Company’s site and/or take legal action. So long as you comply with these terms and conditions, the Company grants to you a non-exclusive, non-transferable, revocable license to access and use the Data for the sole purpose of assisting you in designing machines that incorporate products.
    4. Disclaimer of Warranty
    ANY AND ALL CONTENT APPEARING ON THIS WEB SITE IS PROVIDED FOR INFORMATIONAL PURPOSES ONLY. THIS WEB SITE, ITS CONTENT AND ITS LINKS ARE PROVIDED ON AN "AS IS" AND "AS AVAILABLE" BASIS AND ARE USED ONLY AT YOUR SOLE RISK, TO THE FULLEST EXTENT PERMISSIBLE BY LAW. THE COMPANY DISCLAIMS ALL WARRANTIES, EXPRESS OR IMPLIED, OF ANY KIND, REGARDING THIS WEB SITE (INCLUDING ITS CONTENT, HARDWARE, SOFTWARE AND LINKS), INCLUDING AS TO FITNESS FOR A PARTICULAR PURPOSE, MERCHANTABILITY, TITLE, NON INFRINGEMENT, RESULTS, ACCURACY, COMPLETENESS, ACCESSIBILITY, COMPATIBILITY, SECURITY AND FREEDOM FROM COMPUTER VIRUS. THE COMPANY WILL NOT BE LIABLE FOR ANY DAMAGES OR LOSSES, INCLUDING DIRECT, INDIRECT, CONSEQUENTIAL, SPECIAL, INCIDENTAL OR PUNITIVE DAMAGES AND/OR LOST PROFITS, IN CONNECTION WITH USE OF THE INTERNET, THIS WEB SITE, ITS CONTENT OR ITS LINKS
    Further, the Company will not be liable to you for any failure or delay by the Company to provide access to the Data or any of its obligations under these terms and conditions where such failure or delay is the direct or indirect result of any circumstances beyond the Company's reasonable control (and the Company's obligations will be suspended for the duration of such circumstances).
    5. Policy of Third Parties
    You may be required to separately agree to third party's policies if you use third party software to create or browse the Data or use a third party’s CAD data. In this case, the Company does not assume any responsibility for defects of such CAD data or the software of the third party or violation of their rights. Understand them before use.

    CAD Data Download (Unit Assembly)

    CAD Data Download: File Format
    生成

    Thank you for downloading the data.

    Click the Good IDEA! button when this application example is helpful.


    This data is utilized in order to list more useful application examples in the future.

    Cautions on the CAD data

    1. Assembly data shows the assembly drawings in the concept design phase. The sole purpose of the data is to explain the structure and functionality of the assembly and is not considered nor to be used as a final design.
      You will need to edit the Data so that it meets your specific design conditions.
    2. The CAD data unit assembly consists of sub-assemblies.
      Each sub-assembly unit can be used as it is or can be edited.
    3. * The part in the frame is a sub-assembly unit.

    4. The Data for fabricated parts is based on easy-to-edit dimensions and shapes in sketches and histories.
    5. The Data including the third-part components are made by the Company.

    Back to top

  • * Unit assembly CAD data consists of some sub-assemblies.
       Each sub-assembly unit can be used as it is or can be edited.

Application Overview

Purpose

  • Purpose
    • Adjust workpiece height during engraving process.
  • Operation
    • First loosen the lead screw by unlocking the lead screw clamp mounted behind the position indicator. Adjust the height of the workpiece by rotating the hand crank wheel at the end. A vertical scale is mounted beside the lead screw support to provide height adjustments, lock the lead screw clamp again to maintain position.

Points for use

  • Secure and maintain height positions.

Target workpiece

  • Shape: Name plate
  • Size: W50 x D100 x H2mm
  • Weight 40g

Design Specifications

Operating Conditions or Design Requirements

  • Elevator stroke: ±10mm
  • Distance from the sensor flag to overload detection sensor: 4.37mm
  • External size: W510 x D380 x H157mm

Required Performance

  • Positioning accuracy: ±0.1mm
  • Load weight: 25kg

Selection Criteria for Main Components

  • The linear guide incline angle 18° set as diagonally mounted wedge, a lead screw with 3mm lead is selected in order to obtain 1mm elevation per 1 rotation of the handle (tan18° x 3 ≈ 1).

Design Evaluation

Verification of main components

  • Verify the manual operation force against the moving body.
  • Confirmation of the force to rotate the handle.
    • Conditional value: Moving body mass W = 25kg, Gravitational acceleration g = 9.8m/s², Lead screw lead
      R = 3mm = 0.3cm, lead angle d = 4° 22' = 4.37°, dynamic friction coefficient µ = 0.21, linear guide incline angle θ = 18°, Lever position from the center of handle L = 22mm = 2.2cm
    • Force acting in the vertical direction: W = m x g = 25 x 9.8=245N
    • Force acting in the horizintal direction: F = W x tanθ = 245 x tan18° = 79.6N
    • Screw efficiency: η = (1 - µ x tan (d)) / (1 + µ / tan (d)) = (1 -0.21 x tan4.37°) / (1 + 0.21 / tan4.37°) = 0.263
    • Load torque: T = (F x R) / (2 x π x η) = (79.6 x 0.3) / (2 x π x 0.263) = 14.5N・cm
      Force applicable on lever of the handle P = T / L = 14.5 / 2.2 = 6.6N

Other Design Consideration

  • The rotary to lifting mechanism is made possible by the use of lead screw and an angle mounted linear slide.
  • The height of the workpiece is fixed by locking the lead screw using a clamp.
  • A vertical scale is mounted to provide height readout.

Explore Similar Application Examples

Page - / -

Part List

No. Part Name Sample picture MISUMI Part Number
For Price and Days to ship click on Part No.
Quantity
1 Linear Guides SSE2BNZ13-145 1
2 Linear Guides SSE2BNZ13-270 1
3 Resin Lead Screw Nuts MTSRR14 1
4 Lead Screws MTSWK14-240-S70-RC-FE13-FW6-FY1 1
5 Lead Screw Support Unit MTWZ-CP10 1
6 Knurled Handwheels - Resin CHBK63 1
7 Digital Positioning Indicators DSNR3-CSE8 1
8 Flanged Linear Bushings LHIFC-MX20 4
9 Linear Shaft PSFU20-135-RC17 2
10 Linear Shaft PSFUC20-135-M8-SC95-RC112 2
11 Shaft Collars SSCSP20-12 2
12 Shaft Supports SSTHR20 4
13 Metal Washers WSSS30-8-5 2
14 Leveling Bolts LVBS16-25 3
15 Screw Stopper LVNS16 3
16 Pointing Plates PPPS30 1
17 Point Plate MEPCT-300 1
18 Workpiece Guide WGLJ-50-12-15 2
19 Hex Socket Set Screws MSSK5-6 1
20 Socket Head Cap Screws-with Washer SCBS5-16 4
21 Socket Head Cap Screws-with Washer SCBS5-20 2
  • The part list above contains only MISUMI parts.
    The list of parts and machined products of other manufacturers than MISUMI can also be downloaded by part list download (CSV).
  • TERMS AND CONDITIONS FOR USE OF CAD DATA
    Your access to the CAD data that MISUMI Corporation (hereinafter referred to as the Company) posts on this site (including 3D CAD data, intermediate 3D CAD data and 2D CAD data; hereinafter referred to as the Data) are of products manufactured and/or sold by the Company (hereinafter referred to as the Products) assumes that you have read and accepted these terms and conditions which govern your use of the Data. If you do not agree to these terms and conditions, you must stop using this website and the Data. You must not use the Data for any unlawful purpose or in any manner inconsistent with these terms and conditions.
    1. CAD Data
    The Data is prepared for assisting the Company's users in the CAD design process by providing dimensions and other Product information. In order to provide the best speed and stability working within this site, the Product drawings were simplified to reduce the size of the Data. For instance, some of the Products are shown without the oil groove shape, screws or spring shape. Also, please be aware that the tolerance, surface roughness and/or chamfer of the Data may vary from the actual Products.
    2. Disclaimer on Data
    While the Company has carefully prepared the Data, accuracy of the Data is not guaranteed and is subject to the variances as described above. The Company may also modify, add or delete the Data at any time without prior notice. The Company assumes no liability for any direct, indirect, consequential or special damages that you may claim resulted from your use of the Data or any changes to or deletions of the Data regardless of the reason. The Company provides no warranty as to the quality, accuracy, functionality, safety or reliability of the combination of Products and parts. Example applications and combinations of the Products are provided for illustrative purposes only.
    3. Copyright
    Copyrights to the content and the Data belong to the Company or the manufacturers of the Products. The said copyright is protected by the Copyright Act and international treaties. The use (including duplication, modification, uploading, posting, transmission, distribution, licensing, sales and publishing) of the Data except for the purpose to use the Data described above without prior approval of the Company is not allowed. The Data cannot be used for any purposes (including sales promotion) except for designing your machine. If you violate this provision or the laws or regulations, the Company may prohibit you from the use of the Data, the Company’s site and/or take legal action. So long as you comply with these terms and conditions, the Company grants to you a non-exclusive, non-transferable, revocable license to access and use the Data for the sole purpose of assisting you in designing machines that incorporate products.
    4. Disclaimer of Warranty
    ANY AND ALL CONTENT APPEARING ON THIS WEB SITE IS PROVIDED FOR INFORMATIONAL PURPOSES ONLY. THIS WEB SITE, ITS CONTENT AND ITS LINKS ARE PROVIDED ON AN "AS IS" AND "AS AVAILABLE" BASIS AND ARE USED ONLY AT YOUR SOLE RISK, TO THE FULLEST EXTENT PERMISSIBLE BY LAW. THE COMPANY DISCLAIMS ALL WARRANTIES, EXPRESS OR IMPLIED, OF ANY KIND, REGARDING THIS WEB SITE (INCLUDING ITS CONTENT, HARDWARE, SOFTWARE AND LINKS), INCLUDING AS TO FITNESS FOR A PARTICULAR PURPOSE, MERCHANTABILITY, TITLE, NON INFRINGEMENT, RESULTS, ACCURACY, COMPLETENESS, ACCESSIBILITY, COMPATIBILITY, SECURITY AND FREEDOM FROM COMPUTER VIRUS. THE COMPANY WILL NOT BE LIABLE FOR ANY DAMAGES OR LOSSES, INCLUDING DIRECT, INDIRECT, CONSEQUENTIAL, SPECIAL, INCIDENTAL OR PUNITIVE DAMAGES AND/OR LOST PROFITS, IN CONNECTION WITH USE OF THE INTERNET, THIS WEB SITE, ITS CONTENT OR ITS LINKS
    Further, the Company will not be liable to you for any failure or delay by the Company to provide access to the Data or any of its obligations under these terms and conditions where such failure or delay is the direct or indirect result of any circumstances beyond the Company's reasonable control (and the Company's obligations will be suspended for the duration of such circumstances).
    5. Policy of Third Parties
    You may be required to separately agree to third party's policies if you use third party software to create or browse the Data or use a third party’s CAD data. In this case, the Company does not assume any responsibility for defects of such CAD data or the software of the third party or violation of their rights. Understand them before use.

    CAD Data Download (Unit Assembly)

    CAD Data Download: File Format
    生成

    Thank you for downloading the data.

    Click the Good IDEA! button when this application example is helpful.


    This data is utilized in order to list more useful application examples in the future.

    Cautions on the CAD data

    1. Assembly data shows the assembly drawings in the concept design phase. The sole purpose of the data is to explain the structure and functionality of the assembly and is not considered nor to be used as a final design.
      You will need to edit the Data so that it meets your specific design conditions.
    2. The CAD data unit assembly consists of sub-assemblies.
      Each sub-assembly unit can be used as it is or can be edited.
    3. * The part in the frame is a sub-assembly unit.

    4. The Data for fabricated parts is based on easy-to-edit dimensions and shapes in sketches and histories.
    5. The Data including the third-part components are made by the Company.

    Back to top

Back to top