ideanote
inCAD Library

Make sure to read this before use

What is inCAD Library?

  • Helpful application examples for mechanical engineers.

The Concept of inCAD Library

  • Online application library with a range of ideas for all manufacturing industries.
  • Save design time and learn new design applications when you are concepting new machines.

Disclaimer

  • MISUMI may not offer all parts in each application design. Available parts can only be purchased separately not as a unit shown in each application design.
  • MISUMI does not guarantee quality, accuracy, functionality, safety or reliability for the combination of the parts in each application example. Accept these points prior to use.
  • 2014 Copyright MISUMI
  • The data cannot be used for any purposes (including sales promotion) except for designing your machine.
  • All associated CAD is free. MISUMI reserves the right at its sole discretion to cancel, terminate or modify this offer.
  • MISUMI may change, add or delete application examples posted without prior notice.
  • MISUMI assumes no responsibilities for any damage incurred resulting from your use of the Service or any change, addition or deletion by MISUMI of the application examples for any reason whatsoever.

Features of inCAD Library

  1. Get great new design ideas for these application examples.
  2. Over 200 design application ideas collected from dozens of industries!

  3. Find application examples quickly! Search by function, workpiece shape, etc.

  4. Download the CAD models for each application example.
  5. Log in to download free CAD models.
    Download CAD for the entire application example!

Good IDEA! Button

Click the Good IDEA! Button when you like an application example!

*Can only be clicked once per application example.

  • Upper right corner on the page of application example details

  • Pop-up dialog for CAD data downloading

Back to top

inCAD Library Keyword Search
inCAD Library No. Search

No.000261 Workpiece clamp mechanism

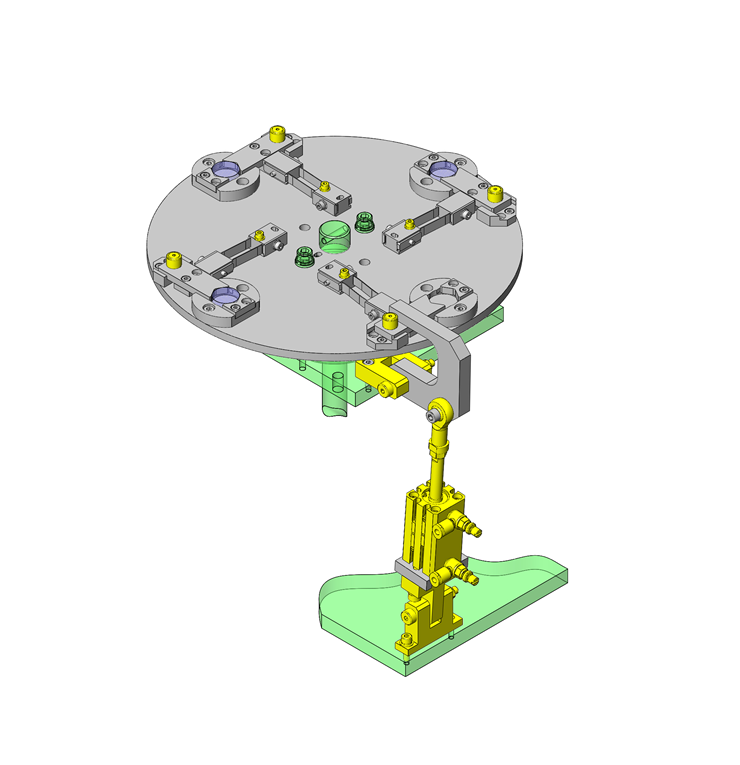
A workpiece clamping and unclamping mechanism.

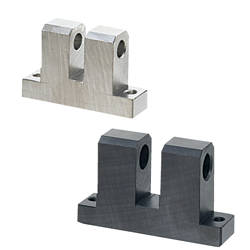
Hinge Bases

Product name Hinge Bases/U-Shaped
Part number HKPB6-H25
* Orange colored cells in the table below indicate the part numbers used in this example.

Selection criteria

Select a standard product that is easy to obtain as a fulcrum for the clevis cylinder.

Back to page top

Available sizes

■Hinge Bases - U-Shaped

Type Material Surface Treatment
U-Shaped EN 1.1191 Equiv. Black Oxide
Electroless Nickel Plating
EN 1.4301 Equiv. -

■Sizes and Dimensions

Pin Dia. Pin hole height
in 1mm increments
U-shape dimensions
2 15 ~ 20 4
3 20 ~ 25 6
4 8
5 25 ~ 30
6 10
8 30 ~ 40
10
12 12
13
14 35 ~ 45
15 16
16
20 40 ~ 50 20
25 30

Back to page top

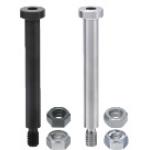
Precision Pivot Pins

Product name Precision Pivot Pins/Flanged/Hex Socket Head/Threaded with Lock Nut
Part number CLBRU6-32
* Orange colored cells in the table below indicate the part numbers used in this example.

Selection criteria

Select a lock nut type, which can be firmly mounted as a clevis pin.

Back to page top

Available sizes

■Precision Pivot Pins - Flanged, Hex Socket Head, Threaded with Lock Nut

Material Hardness Surface Treatment Included Nut Material
Standard Nut U Nut
EN 1.1191 Equiv. - Black Oxide JIS-SWRCH EN 1.0038 Equiv.
40 ~ 45HRC
- Electroless Nickel Plating EN 1.4301 Equiv. EN 1.4301 Equiv.
40 ~ 45HRC
Plating Hardness 750HV - Hard Chrome Plating JIS-SWRM EN 1.0038 Equiv.
Plating Thickness 3μm or more
EN 1.4301 Equiv. - - EN 1.4301 Equiv. EN 1.4301 Equiv.
EN 1.4125 Equiv. 45 ~ 50HRC
45 ~ 50HRC
Plating Hardness 750HV -
Hard Chrome Plating
Plating Thickness 3μm or more

■Sizes and Dimensions

Pin Dia. Pin Section Length
(Configurable in 0.1mm Increments)
Head
O.D.
Head
Height
Thread Length Thread Dia. X Pitch
Ø4 10.0-50.0 Ø7 5 6 M3 x 0.5
Ø5 10.0-60.0 Ø9 M4 x 0.7
Ø6 10.0-100.0 Ø10 9 M5 x 0.8
Ø8 10.0-100.0 Ø13 M6 x 1.0
Ø10 Ø16 12 M8 x 1.25
Ø12 10.0-200.0 Ø18 16 M10 x 1.5
Ø13 20.0-200.0 Ø24 18 M12 x 1.75
Ø14
Ø15
Ø16 20.0-200.0
Ø17
Ø18 24
Ø20 Ø27 M16 x 2.0
Ø22 20.0-200.0
Ø25 Ø30

Back to page top

Accuracy Info

■Precision Pivot Pins

Pin Dia. Tolerance
Ø4-Ø6 -0.004
-0.012
Ø8 ・ Ø10 -0.005
-0.014
Ø12-Ø18 -0.006
-0.017
Ø20 ・ Ø22 ・ Ø25 -0.007
-0.020

Back to page top

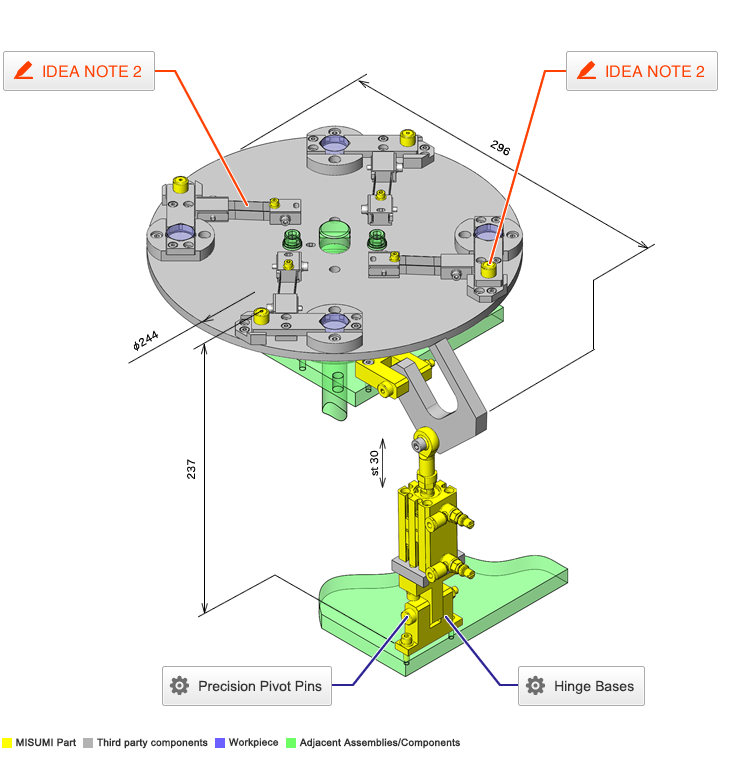
IDEA NOTE A mechanism that clamps/unclamps workpieces by pushing the cam follower on the side.

A cam follower is mounted on the pushed part of the turntable. When a part enters the turntable, the cam follower hits the side of the received part, unclamping the product.

IDEA NOTE Multiple workpieces can be set.

The vacant space in the turntable is used to house the flat spring. The mechanism has a space-saving structure and is capable of setting multiple workpieces.The current table can be expanded to 8 units.

  • TERMS AND CONDITIONS FOR USE OF CAD DATA
    Your access to the CAD data that MISUMI Corporation (hereinafter referred to as the Company) posts on this site (including 3D CAD data, intermediate 3D CAD data and 2D CAD data; hereinafter referred to as the Data) are of products manufactured and/or sold by the Company (hereinafter referred to as the Products) assumes that you have read and accepted these terms and conditions which govern your use of the Data. If you do not agree to these terms and conditions, you must stop using this website and the Data. You must not use the Data for any unlawful purpose or in any manner inconsistent with these terms and conditions.
    1. CAD Data
    The Data is prepared for assisting the Company's users in the CAD design process by providing dimensions and other Product information. In order to provide the best speed and stability working within this site, the Product drawings were simplified to reduce the size of the Data. For instance, some of the Products are shown without the oil groove shape, screws or spring shape. Also, please be aware that the tolerance, surface roughness and/or chamfer of the Data may vary from the actual Products.
    2. Disclaimer on Data
    While the Company has carefully prepared the Data, accuracy of the Data is not guaranteed and is subject to the variances as described above. The Company may also modify, add or delete the Data at any time without prior notice. The Company assumes no liability for any direct, indirect, consequential or special damages that you may claim resulted from your use of the Data or any changes to or deletions of the Data regardless of the reason. The Company provides no warranty as to the quality, accuracy, functionality, safety or reliability of the combination of Products and parts. Example applications and combinations of the Products are provided for illustrative purposes only.
    3. Copyright
    Copyrights to the content and the Data belong to the Company or the manufacturers of the Products. The said copyright is protected by the Copyright Act and international treaties. The use (including duplication, modification, uploading, posting, transmission, distribution, licensing, sales and publishing) of the Data except for the purpose to use the Data described above without prior approval of the Company is not allowed. The Data cannot be used for any purposes (including sales promotion) except for designing your machine. If you violate this provision or the laws or regulations, the Company may prohibit you from the use of the Data, the Company’s site and/or take legal action. So long as you comply with these terms and conditions, the Company grants to you a non-exclusive, non-transferable, revocable license to access and use the Data for the sole purpose of assisting you in designing machines that incorporate products.
    4. Disclaimer of Warranty
    ANY AND ALL CONTENT APPEARING ON THIS WEB SITE IS PROVIDED FOR INFORMATIONAL PURPOSES ONLY. THIS WEB SITE, ITS CONTENT AND ITS LINKS ARE PROVIDED ON AN "AS IS" AND "AS AVAILABLE" BASIS AND ARE USED ONLY AT YOUR SOLE RISK, TO THE FULLEST EXTENT PERMISSIBLE BY LAW. THE COMPANY DISCLAIMS ALL WARRANTIES, EXPRESS OR IMPLIED, OF ANY KIND, REGARDING THIS WEB SITE (INCLUDING ITS CONTENT, HARDWARE, SOFTWARE AND LINKS), INCLUDING AS TO FITNESS FOR A PARTICULAR PURPOSE, MERCHANTABILITY, TITLE, NON INFRINGEMENT, RESULTS, ACCURACY, COMPLETENESS, ACCESSIBILITY, COMPATIBILITY, SECURITY AND FREEDOM FROM COMPUTER VIRUS. THE COMPANY WILL NOT BE LIABLE FOR ANY DAMAGES OR LOSSES, INCLUDING DIRECT, INDIRECT, CONSEQUENTIAL, SPECIAL, INCIDENTAL OR PUNITIVE DAMAGES AND/OR LOST PROFITS, IN CONNECTION WITH USE OF THE INTERNET, THIS WEB SITE, ITS CONTENT OR ITS LINKS
    Further, the Company will not be liable to you for any failure or delay by the Company to provide access to the Data or any of its obligations under these terms and conditions where such failure or delay is the direct or indirect result of any circumstances beyond the Company's reasonable control (and the Company's obligations will be suspended for the duration of such circumstances).
    5. Policy of Third Parties
    You may be required to separately agree to third party's policies if you use third party software to create or browse the Data or use a third party’s CAD data. In this case, the Company does not assume any responsibility for defects of such CAD data or the software of the third party or violation of their rights. Understand them before use.

    CAD Data Download (Unit Assembly)

    CAD Data Download: File Format
    生成

    Thank you for downloading the data.

    Click the Good IDEA! button when this application example is helpful.


    This data is utilized in order to list more useful application examples in the future.

    Cautions on the CAD data

    1. Assembly data shows the assembly drawings in the concept design phase. The sole purpose of the data is to explain the structure and functionality of the assembly and is not considered nor to be used as a final design.
      You will need to edit the Data so that it meets your specific design conditions.
    2. The CAD data unit assembly consists of sub-assemblies.
      Each sub-assembly unit can be used as it is or can be edited.
    3. * The part in the frame is a sub-assembly unit.

    4. The Data for fabricated parts is based on easy-to-edit dimensions and shapes in sketches and histories.
    5. The Data including the third-part components are made by the Company.

    Back to top

  • * Unit assembly CAD data consists of some sub-assemblies.
       Each sub-assembly unit can be used as it is or can be edited.

Application Overview

Purpose

  • Clamps workpieces using a flat spring.
  • The workpiece is held on the turntable using a linking mechanism, and unclamped through the use of a cam follower mounted on the table.

Points for use

  • Rotates the turn table using separate units and stops in the unclamping position. The work piece can then be removed, and operated for the next clamping and rotation.

Target workpiece

  • Material: ABS disc
  • External dimensions: Ø16 x 6mm
  • Workpiece mass: 2g

Design Specifications

Operating Conditions or Design Requirements

  • Cylinder stroke: 30mm
  • Deflection of the flat spring at clamp 1.5mm
  • Deflection of the flat spring at unclamp 3mm.
  • External dimensions: W296 x D244 x H237mm

Required Performance

  • Spring load: 1N (with the workpiece clamped)
  • Flat spring material: EN 1.4301 Equiv.

Selection Criteria for Main Components

  • Flat spring
    • Can utilize the available space and meets the clamping load needs.

Design Evaluation

Verification of main components

  • Flat spring
    • Required plate thickness: t
      Plate width: b = 7mm
      Clamp force: P = 1N
      Young's modulus: E = 199GPa
      Load position: l = 37mm
      Deflection at clamp: δ = 1.5mm
      Number of flat springs used: n = 2pieces
      t = ((12 x P/n x l³)/(3 x δ x E x b))⅓
      = ((12 x 1/2 x 37³)/(3 x 1.5 x 199 x 10³ x 7))⅓
      = 0.36
      From t > 0.36mm, t is set to be t = 0.4mm.

Other Design Consideration

  • A mechanism that clamps and unclamps a workpiece from the side. A cam follower is used for the unclamping unclamp process to achieve a floating condition.

Explore Similar Application Examples

Page - / -

Part List

No. Part Name Sample picture MISUMI Part Number
For Price and Days to ship click on Part No.
Quantity
1 Air Cylinders MSCCA16-30 1
2 Flow Rate Control Valves SPSNL4-M5 2
3 Sensors for Air Cylinders MD13L1 2
4 Rod End Bearings PHSC6 1
5 Hinge Bases HKPB6-H25 1
6 Hinge Bases HKTB10-H30 1
7 Hinge Bases HGSUB6-W10-H30 1
8 Oil Free Bushings MPBZ6-10 2
9 Hinge Pins CLBRU6-32 2
10 Cam Followers CFUA3-10 4
11 Socket Head Cap Screws-with Washer CBST3-15 8
12 Socket Head Cap Screws-with Washer CBST4-15 2
13 Socket Head Cap Screws-with Washer CBST5-20 2
  • The part list above contains only MISUMI parts.
    The list of parts and machined products of other manufacturers than MISUMI can also be downloaded by part list download (CSV).
  • TERMS AND CONDITIONS FOR USE OF CAD DATA
    Your access to the CAD data that MISUMI Corporation (hereinafter referred to as the Company) posts on this site (including 3D CAD data, intermediate 3D CAD data and 2D CAD data; hereinafter referred to as the Data) are of products manufactured and/or sold by the Company (hereinafter referred to as the Products) assumes that you have read and accepted these terms and conditions which govern your use of the Data. If you do not agree to these terms and conditions, you must stop using this website and the Data. You must not use the Data for any unlawful purpose or in any manner inconsistent with these terms and conditions.
    1. CAD Data
    The Data is prepared for assisting the Company's users in the CAD design process by providing dimensions and other Product information. In order to provide the best speed and stability working within this site, the Product drawings were simplified to reduce the size of the Data. For instance, some of the Products are shown without the oil groove shape, screws or spring shape. Also, please be aware that the tolerance, surface roughness and/or chamfer of the Data may vary from the actual Products.
    2. Disclaimer on Data
    While the Company has carefully prepared the Data, accuracy of the Data is not guaranteed and is subject to the variances as described above. The Company may also modify, add or delete the Data at any time without prior notice. The Company assumes no liability for any direct, indirect, consequential or special damages that you may claim resulted from your use of the Data or any changes to or deletions of the Data regardless of the reason. The Company provides no warranty as to the quality, accuracy, functionality, safety or reliability of the combination of Products and parts. Example applications and combinations of the Products are provided for illustrative purposes only.
    3. Copyright
    Copyrights to the content and the Data belong to the Company or the manufacturers of the Products. The said copyright is protected by the Copyright Act and international treaties. The use (including duplication, modification, uploading, posting, transmission, distribution, licensing, sales and publishing) of the Data except for the purpose to use the Data described above without prior approval of the Company is not allowed. The Data cannot be used for any purposes (including sales promotion) except for designing your machine. If you violate this provision or the laws or regulations, the Company may prohibit you from the use of the Data, the Company’s site and/or take legal action. So long as you comply with these terms and conditions, the Company grants to you a non-exclusive, non-transferable, revocable license to access and use the Data for the sole purpose of assisting you in designing machines that incorporate products.
    4. Disclaimer of Warranty
    ANY AND ALL CONTENT APPEARING ON THIS WEB SITE IS PROVIDED FOR INFORMATIONAL PURPOSES ONLY. THIS WEB SITE, ITS CONTENT AND ITS LINKS ARE PROVIDED ON AN "AS IS" AND "AS AVAILABLE" BASIS AND ARE USED ONLY AT YOUR SOLE RISK, TO THE FULLEST EXTENT PERMISSIBLE BY LAW. THE COMPANY DISCLAIMS ALL WARRANTIES, EXPRESS OR IMPLIED, OF ANY KIND, REGARDING THIS WEB SITE (INCLUDING ITS CONTENT, HARDWARE, SOFTWARE AND LINKS), INCLUDING AS TO FITNESS FOR A PARTICULAR PURPOSE, MERCHANTABILITY, TITLE, NON INFRINGEMENT, RESULTS, ACCURACY, COMPLETENESS, ACCESSIBILITY, COMPATIBILITY, SECURITY AND FREEDOM FROM COMPUTER VIRUS. THE COMPANY WILL NOT BE LIABLE FOR ANY DAMAGES OR LOSSES, INCLUDING DIRECT, INDIRECT, CONSEQUENTIAL, SPECIAL, INCIDENTAL OR PUNITIVE DAMAGES AND/OR LOST PROFITS, IN CONNECTION WITH USE OF THE INTERNET, THIS WEB SITE, ITS CONTENT OR ITS LINKS
    Further, the Company will not be liable to you for any failure or delay by the Company to provide access to the Data or any of its obligations under these terms and conditions where such failure or delay is the direct or indirect result of any circumstances beyond the Company's reasonable control (and the Company's obligations will be suspended for the duration of such circumstances).
    5. Policy of Third Parties
    You may be required to separately agree to third party's policies if you use third party software to create or browse the Data or use a third party’s CAD data. In this case, the Company does not assume any responsibility for defects of such CAD data or the software of the third party or violation of their rights. Understand them before use.

    CAD Data Download (Unit Assembly)

    CAD Data Download: File Format
    生成

    Thank you for downloading the data.

    Click the Good IDEA! button when this application example is helpful.


    This data is utilized in order to list more useful application examples in the future.

    Cautions on the CAD data

    1. Assembly data shows the assembly drawings in the concept design phase. The sole purpose of the data is to explain the structure and functionality of the assembly and is not considered nor to be used as a final design.
      You will need to edit the Data so that it meets your specific design conditions.
    2. The CAD data unit assembly consists of sub-assemblies.
      Each sub-assembly unit can be used as it is or can be edited.
    3. * The part in the frame is a sub-assembly unit.

    4. The Data for fabricated parts is based on easy-to-edit dimensions and shapes in sketches and histories.
    5. The Data including the third-part components are made by the Company.

    Back to top

Back to top