We are using cookies to offer a more comfortable experience in our online shop

For example, we can show you personalized product recommendations and offer the best possible service functions in the ordering process. You can manage your cookie settings under privacy policy regulations at any time.

ideanote
inCAD Library

Make sure to read this before use

What is inCAD Library?

  • Helpful application examples for mechanical engineers.

The Concept of inCAD Library

  • Online application library with a range of ideas for all manufacturing industries.
  • Save design time and learn new design applications when you are concepting new machines.

Disclaimer

  • MISUMI may not offer all parts in each application design. Available parts can only be purchased separately not as a unit shown in each application design.
  • MISUMI does not guarantee quality, accuracy, functionality, safety or reliability for the combination of the parts in each application example. Accept these points prior to use.
  • 2014 Copyright MISUMI
  • The data cannot be used for any purposes (including sales promotion) except for designing your machine.
  • All associated CAD is free. MISUMI reserves the right at its sole discretion to cancel, terminate or modify this offer.
  • MISUMI may change, add or delete application examples posted without prior notice.
  • MISUMI assumes no responsibilities for any damage incurred resulting from your use of the Service or any change, addition or deletion by MISUMI of the application examples for any reason whatsoever.

Features of inCAD Library

  1. Get great new design ideas for these application examples.
  2. Over 200 design application ideas collected from dozens of industries!

  3. Find application examples quickly! Search by function, workpiece shape, etc.

  4. Download the CAD models for each application example.
  5. Log in to download free CAD models.
    Download CAD for the entire application example!

Good IDEA! Button

Click the Good IDEA! Button when you like an application example!

*Can only be clicked once per application example.

  • Upper right corner on the page of application example details

  • Pop-up dialog for CAD data downloading

Back to top

inCAD Library Keyword Search
inCAD Library No. Search

No.000281 Centering mechanism

A single cylinder centering mechanism

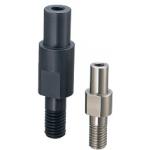
Cantilever Shafts

Product name Cantilever Shafts/Pilot/Standard/Threaded/w Tapped End
Part number SFXCB15-18-F29-G6-MA8
* Orange colored cells in the table below indicate the part numbers used in this example.

Selection criteria

Select the standard item to use as the fulcrum of the link rotation

Back to page top

Available sizes

■Cantilever Shafts - Pilot Type - Standard, Threaded, with Tapped End

Material Surface Treatment
EN 1.1191 Equiv. Black Oxide
Electroless Nickel Plating
EN 1.4301 Equiv. -

■Sizes and Dimensions

Pin Dia.
(mm)
(1 mm Increments) M(Coarse)
Y F G N
6 2-60 5-100 5-10 6-12 M6
8 8-16 M8
10 10-20 M10
12 10-150 5-15 12-24 M12
13
15
16
17 5-20
18
20 4-75 20-40 M20
M16
22 M20
M16
25 M20
M16
30 M20
M16

Back to page top

Accuracy Info

■Accuracy of Cantilever Shafts

Perpendicularity: 0.02

Pin Dia.
(mm)
Tolerance g6
(mm)
6 -0.004
-0.012
8 -0.005
-0.014
10
12 -0.006
-0.017
13
15
16
17
18
20 -0.007
-0.020
22
25
30

Back to page top

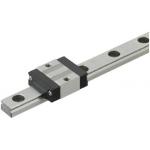
Miniature Linear Guide

Product name Miniature Linear Guides/Short Block
Part number SSEBSZ13L-70
Features 20% more compact than standard blocks.
* Orange colored cells in the table below indicate the part numbers used in this example.

Selection criteria

Select a linear guide to obtain the accurate motion of claws.

Back to page top

Available sizes

■Miniature Linear Guide - Short Block

Material Hardness
Stainless Steel 56 HRC or more
Free Cutting Steel (Alloy Steel including SCM) 58 HRC or More

■Sizes and Dimensions

Overall Height Block Width Block Length Rail Length
8 17 19.6 40 ~ 130
10 20 22.9 35 ~ 275
13 27 27 45 ~ 470
16 32 32.7 70 ~ 670

Back to page top

Selection steps

■Miniature Linear Guide Selection Steps

Determine conditions of use
(Moving mass, feed rate, motion pattern, life)

Temporary select linear guide specifications
(Block type, overall height, rail length are temporarily selected
according to the conditions of use.)

Basic safety check
  • ●Allowable Load
  • ●Operating Life
  • ●Preload

Back to page top

Accuracy Info

■Preload and Accuracy Standards (Normal Preload, Slight Clearance type)

Light Preload, Slight Clearance Type

Light Preload
High Grade
Slight Clearance
Standard Grade
Radial Clearance -3 ~ 0 0 ~ +15
Dimensional Accuracy(μm) High Grade Standard Grade
H Dimension Tolerance ±20 ±20
Pair Variation of H 15 40
W2 Dimension Tolerance ±25 ±25
Pair Variation of H 20 40

■Running Parallelism

(μm)

Rail Length(mm)
~ 50 51 ~ 80 81 ~ 125 126 ~ 200 201 ~ 250 251 ~ 315 316 ~ 400 401 ~ 500 501 ~ 630 631 ~ 800
High Grade 3 3 7 7 9 11 11 12 13.5 14
Standard Grade 13 13 15 15 17 18 18 19 21 21.5

* The slight clearance type has clearances (play) between the rails and blocks.

Back to page top

Performance info.

■Load Rating of Miniature Linear Guides (Short Blocks, Light Preload / Slight Clearance Type)

Overall Height Basic Load Rating Allowable Static Moment
C (Dynamic) kN Co (Static) kN MA
N ・ m
MB
N ・ m
Mc
N ・ m
8 0.79 1.27 1.9 1.6 4.6
10 1.16 1.68 3.1 2.6 7.9
13 1.63 2.38 5.2 4.4 14.8
16 3.08 4.23 12.3 10.3 32.6

Back to page top

Technical calculations

■Operating Life Calculation for Linear Guides

●Operating Life
When the linear guide is loaded in linear reciprocating motion, scaly damages called flaking appear due to material fatigue as the stress works on the rolling elements (steel balls) and the rolling contact surfaces (rails) constantly. Total travel distance until the first flaking occurs is called the life of linear guides.
●Rated Life
Rated life is the total travel distance that 90% of linear guides of the same type can reach, under the same conditions, with no occurrence of flaking damage. Rated life can be calculated with the basic dynamic load rating and the actual load applied on the linear guides, as shown below.
Load must be calculated before actually using linear guides. To obtain loads during linear reciprocating motion, it is necessary to fully consider vibrations and impacts during motion as well as distribution condition of the load applied to linear guides. So, it is not easy to calculation the loads. Operating temperature also critically affects the life. Considering these conditions, the above-mentioned calculation formula will be as follows.
  • L: Rated Life (Km)
  • fH: Hardness Factor (See Fig.1)
  • fT: Temperature Factor (See Fig.2)
  • fC: Contact Factor (See Table-1)
  • fW: Load Factor (See Table-2)
  • C: Basic Dynamic Load Rating (N)
  • P: Applied Load (N)
●Hardness Factor (fH)

For linear applications, the shafts and ball bearings must have sufficient hardness. If they do not, the load rating decreases and the life will be reduced.
Please correct the rated life with the hardness factor.

●Temperature Factor (fT)

When the temperature of the linear system exceeds 100 degrees C, the hardness will decrease and as a result, the allowable load and life will reduced.
* Please use Linear Guides at within the heat resistance temperature ranges shown on product pages.

●Contact Factor (fC)

Table-1. Contact Factor

Number of Blocks per Rail Contact Factor fC

1 1.00
2 0.81
3 0.72
4 0.66
5 0.61

For actual applications, more than two blocks are generally used per shaft. In this case, the load applied to each block varies depending on machining precision and is not uniformly distributed. As a result, per-linear guide allowable load varies depending on the number of linear guides per rail.
Please compensate rated life with Contact Factors on Table - 1.

●Load Factor (fW)

Table-2. Load Factor

Condition of Use fw
No external shocks / vibrations,
low speed 15 m/min or less
1.0-1.5
No significant shocks / vibrations,
medium speed 60 m/min or less
1.5-20
With external shocks / vibrations,
high speed exceeding 60 m/min
2.0-3.5

To calculate load applied to the Linear Guides, in addition to object weight, it requires inertia force attributed to motion velocity or moment loads. However, it is difficult to calculation the load accurately due to potential vibrations and shocks caused by other element than repeated start-stop motions during reciprocating motion.
Thus, table-2 load factor helps simplify the life calculation.

●Applied Load P Calculation Method
When moment load is applied to each block, convert the moment load into applied load by the following formula.
  • P: Applied Load (N)
  • F: Downward load (N)
  • Co: Static Load Rating (N)
  • MA: Allowable Static Moment - Pitching Direction (N・m)
  • MC: Allowable Static Moment - Rolling Direction (N・m)
  • Lp: Load Point Distance (m) in Pitching Direction
  • Lr: Load Point Distance (m) in Rolling Direction

Back to page top

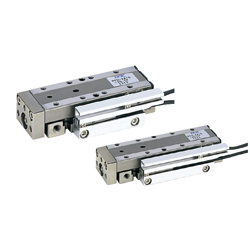
Air Linear Guides

Product name Air Linear Guides/MPPU10 Series
Part number MPPU10-30-SMT
* Orange colored cells in the table below indicate the part numbers used in this example.

Selection criteria

Select a drive source with guides to omit the linear motion guide of one side.

Back to page top

Available sizes

■Air Linear Guides - MPPU10 Series

Cyl. Bore Horizontal
(mm)
Vertical
(mm)
Thickness
(mm)
Stroke Length
(mm)
Ø10 27 70 20 15
85 30
100 45
Ø12 32 76 22 20
86 30
101 45
116 60

Back to page top

Accuracy Info

Bore Dia. Ø10 Ø12
Stroke 15/30/45 20/30/45 60
Parallelism Plane C to Plane A 0.02 0.02
Plane D to Plane B 0.02 0.02
Running Parallelism Plane C to Plane A 0.004 0.004 0.006
Plane D to Plane B 0.004 0.004 0.006
Perpendicularity Plane E to Plane A 0.15 0.15
Plane E to Plane B 0.15 0.15
J Dimension Tolerance ±0.025 ±0.025
F Dimension Tolerance ±0.2 ±0.2
G Dimension Tolerance ±0.2 ±0.2
H Dimension Tolerance ±0.05 ±0.05

Back to page top

Performance info.

■Speeds / Loads (Load Info.) of Air Linear Guides

■Operating Pressure Range

Min. Operating Pressure (MPa): 0.15
Max. Operating Pressure (MPa): 0.70
Pressure Resistance (Mpa): 1.05

■Theoretical Thrust

Unit: N

Cyl.
Bore
Operation
Direction
Rod Dia.
(mm)
Operating Pressure (MPa)
0.4 0.5
Ø10 Outstroke Ø4 31 39
Instroke 26 33
Ø12 Outstroke Ø5 45 57
Instroke 37 47

■Basic Static Load Ratings / Allowable Static Moments

Cyl.
Bore
Stroke
(mm)
Basic Static
Load Rating Co(kN)
Allowable Load Moment N・m
Pitching Yawing Rolling
Ø10 15/30/45 3.4 20.5 24.5 22.5
Ø12 20/30/45/60 4.9 32.3 38.2 41.1

Back to page top

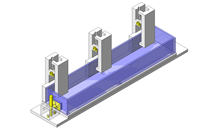
IDEA NOTE Centering method

The push and pull of the cylinder moves the linear guide and the claw. The motion is transferred to another claw through the fulcrum to make both the right and left claws center evenly.

  • TERMS AND CONDITIONS FOR USE OF CAD DATA
    Your access to the CAD data that MISUMI Corporation (hereinafter referred to as the Company) posts on this site (including 3D CAD data, intermediate 3D CAD data and 2D CAD data; hereinafter referred to as the Data) are of products manufactured and/or sold by the Company (hereinafter referred to as the Products) assumes that you have read and accepted these terms and conditions which govern your use of the Data. If you do not agree to these terms and conditions, you must stop using this website and the Data. You must not use the Data for any unlawful purpose or in any manner inconsistent with these terms and conditions.
    1. CAD Data
    The Data is prepared for assisting the Company's users in the CAD design process by providing dimensions and other Product information. In order to provide the best speed and stability working within this site, the Product drawings were simplified to reduce the size of the Data. For instance, some of the Products are shown without the oil groove shape, screws or spring shape. Also, please be aware that the tolerance, surface roughness and/or chamfer of the Data may vary from the actual Products.
    2. Disclaimer on Data
    While the Company has carefully prepared the Data, accuracy of the Data is not guaranteed and is subject to the variances as described above. The Company may also modify, add or delete the Data at any time without prior notice. The Company assumes no liability for any direct, indirect, consequential or special damages that you may claim resulted from your use of the Data or any changes to or deletions of the Data regardless of the reason. The Company provides no warranty as to the quality, accuracy, functionality, safety or reliability of the combination of Products and parts. Example applications and combinations of the Products are provided for illustrative purposes only.
    3. Copyright
    Copyrights to the content and the Data belong to the Company or the manufacturers of the Products. The said copyright is protected by the Copyright Act and international treaties. The use (including duplication, modification, uploading, posting, transmission, distribution, licensing, sales and publishing) of the Data except for the purpose to use the Data described above without prior approval of the Company is not allowed. The Data cannot be used for any purposes (including sales promotion) except for designing your machine. If you violate this provision or the laws or regulations, the Company may prohibit you from the use of the Data, the Company’s site and/or take legal action. So long as you comply with these terms and conditions, the Company grants to you a non-exclusive, non-transferable, revocable license to access and use the Data for the sole purpose of assisting you in designing machines that incorporate products.
    4. Disclaimer of Warranty
    ANY AND ALL CONTENT APPEARING ON THIS WEB SITE IS PROVIDED FOR INFORMATIONAL PURPOSES ONLY. THIS WEB SITE, ITS CONTENT AND ITS LINKS ARE PROVIDED ON AN "AS IS" AND "AS AVAILABLE" BASIS AND ARE USED ONLY AT YOUR SOLE RISK, TO THE FULLEST EXTENT PERMISSIBLE BY LAW. THE COMPANY DISCLAIMS ALL WARRANTIES, EXPRESS OR IMPLIED, OF ANY KIND, REGARDING THIS WEB SITE (INCLUDING ITS CONTENT, HARDWARE, SOFTWARE AND LINKS), INCLUDING AS TO FITNESS FOR A PARTICULAR PURPOSE, MERCHANTABILITY, TITLE, NON INFRINGEMENT, RESULTS, ACCURACY, COMPLETENESS, ACCESSIBILITY, COMPATIBILITY, SECURITY AND FREEDOM FROM COMPUTER VIRUS. THE COMPANY WILL NOT BE LIABLE FOR ANY DAMAGES OR LOSSES, INCLUDING DIRECT, INDIRECT, CONSEQUENTIAL, SPECIAL, INCIDENTAL OR PUNITIVE DAMAGES AND/OR LOST PROFITS, IN CONNECTION WITH USE OF THE INTERNET, THIS WEB SITE, ITS CONTENT OR ITS LINKS
    Further, the Company will not be liable to you for any failure or delay by the Company to provide access to the Data or any of its obligations under these terms and conditions where such failure or delay is the direct or indirect result of any circumstances beyond the Company's reasonable control (and the Company's obligations will be suspended for the duration of such circumstances).
    5. Policy of Third Parties
    You may be required to separately agree to third party's policies if you use third party software to create or browse the Data or use a third party’s CAD data. In this case, the Company does not assume any responsibility for defects of such CAD data or the software of the third party or violation of their rights. Understand them before use.

    CAD Data Download (Unit Assembly)

    CAD Data Download: File Format
    生成

    Thank you for downloading the data.

    Click the Good IDEA! button when this application example is helpful.


    This data is utilized in order to list more useful application examples in the future.

    Cautions on the CAD data

    1. Assembly data shows the assembly drawings in the concept design phase. The sole purpose of the data is to explain the structure and functionality of the assembly and is not considered nor to be used as a final design.
      You will need to edit the Data so that it meets your specific design conditions.
    2. The CAD data unit assembly consists of sub-assemblies.
      Each sub-assembly unit can be used as it is or can be edited.
    3. * The part in the frame is a sub-assembly unit.

    4. The Data for fabricated parts is based on easy-to-edit dimensions and shapes in sketches and histories.
    5. The Data including the third-part components are made by the Company.

    Back to top

  • * Unit assembly CAD data consists of some sub-assemblies.
       Each sub-assembly unit can be used as it is or can be edited.

Application Overview

Purpose

  • Operation
    (1) A workpiece transferred by the conveyor is stopped by the sensor.
    (2) The cylinder conducts synchronous centering.
    (3) The workpiece is adjusted.

Points for use

  • Automatic operation by means of an air cylinder

Target workpiece

  • Plastic boxes
  • External dimensions: W120 x D106 x H50mm
  • Workpiece weight: 1kg

Design Specifications

Operating Conditions or Design Requirements

  • External dimensions: W176 x D330 x H109mm
  • Cylinder stroke: 30mm
  • Conveyor speed: 70mm/s

Required Performance

  • Assumed outstroke force: 15N

Selection Criteria for Main Components

  • Cylinder attached with a guide
    • Select one that can conduct workpiece centering.
  • Linear guides
    • Select a guide that is suited for the claw size because the moment load is not large.

Design Evaluation

Verification of main components

  • Verify the cylinder thrust for adequate workpiece centering force.
  • Cylinder
    • Conditional values: Workpiece weight F1 = 10N, part pushed and pulled by the cylinder F2 = 6N, shaft dia. d = 12mm, friction coefficient workpiece vs. conveyor μ1 = 0.8, friction coefficient of linear guides μ2 = 0.1, the shortest distance between shaft and cylinder L = 70mm, load factor = 0.5, operating pressure = 0.4MPa, tube inner dia. cross sectional area = π/4 x 102mm²
    • Let the force to conduct workpiece centering be P [N]. Then, we have {(F1 x μ1) + (F2 x μ2)} x (d/2) = L x P . Thus, (10 x 0.8 + 6 x 0.1) x 6 = 70 x P → P = 0.74N
    • Cylinder thrust = Load factor x Operating pressure x Tube inner dia. cross sectional area = 0.5 x 0.4MPa x π/4 x 102mm² = 15.7N > 0.74N
      ⇒No problem.

Other Design Consideration

  • The workpiece centering position can be adjusted with the rod-end bearing. Furthermore, workpieces with different sizes can be handled because of sufficient room for screw adjustment.
  • Has a compact structure because of the integration of the linear guides and air cylinder.

Explore Similar Application Examples

Page - / -

Part List

No. Part Name Sample picture MISUMI Part Number
For Price and Days to ship click on Part No.
Quantity
1 Rod End Coupling Rods SLBRKN5-60 2
2 Rod End Bearings PHSS5 2
3 Rod End Bearings(Currently not available) PHSSLM5 2
4 Cantilever Pin SFXCB15-18-F29-G6-MA8 1
5 Fulcrum Pins FCBDW5-8.0-A8-E2.0-F4 4
6 Miniature One-Touch Couplings MNCNP4-M5 2
7 Linear Guides SSEBSZ13L-70 1
8 Air Slide Guide MPPU10-30-SMT 1
9 Socket Head Cap Screws-with Washer SCBS3-10 8
10 Socket Head Cap Screws-with Washer SCBS3-15 2
11 Socket Head Cap Screws-with Washer SCBS8-20 1
12 Dowel Pins MS3-6 2
13 Dowel Pins MS3-10 2
14 Deep Groove Ball Bearings B6202ZZ 2
  • The part list above contains only MISUMI parts.
    The list of parts and machined products of other manufacturers than MISUMI can also be downloaded by part list download (CSV).
  • TERMS AND CONDITIONS FOR USE OF CAD DATA
    Your access to the CAD data that MISUMI Corporation (hereinafter referred to as the Company) posts on this site (including 3D CAD data, intermediate 3D CAD data and 2D CAD data; hereinafter referred to as the Data) are of products manufactured and/or sold by the Company (hereinafter referred to as the Products) assumes that you have read and accepted these terms and conditions which govern your use of the Data. If you do not agree to these terms and conditions, you must stop using this website and the Data. You must not use the Data for any unlawful purpose or in any manner inconsistent with these terms and conditions.
    1. CAD Data
    The Data is prepared for assisting the Company's users in the CAD design process by providing dimensions and other Product information. In order to provide the best speed and stability working within this site, the Product drawings were simplified to reduce the size of the Data. For instance, some of the Products are shown without the oil groove shape, screws or spring shape. Also, please be aware that the tolerance, surface roughness and/or chamfer of the Data may vary from the actual Products.
    2. Disclaimer on Data
    While the Company has carefully prepared the Data, accuracy of the Data is not guaranteed and is subject to the variances as described above. The Company may also modify, add or delete the Data at any time without prior notice. The Company assumes no liability for any direct, indirect, consequential or special damages that you may claim resulted from your use of the Data or any changes to or deletions of the Data regardless of the reason. The Company provides no warranty as to the quality, accuracy, functionality, safety or reliability of the combination of Products and parts. Example applications and combinations of the Products are provided for illustrative purposes only.
    3. Copyright
    Copyrights to the content and the Data belong to the Company or the manufacturers of the Products. The said copyright is protected by the Copyright Act and international treaties. The use (including duplication, modification, uploading, posting, transmission, distribution, licensing, sales and publishing) of the Data except for the purpose to use the Data described above without prior approval of the Company is not allowed. The Data cannot be used for any purposes (including sales promotion) except for designing your machine. If you violate this provision or the laws or regulations, the Company may prohibit you from the use of the Data, the Company’s site and/or take legal action. So long as you comply with these terms and conditions, the Company grants to you a non-exclusive, non-transferable, revocable license to access and use the Data for the sole purpose of assisting you in designing machines that incorporate products.
    4. Disclaimer of Warranty
    ANY AND ALL CONTENT APPEARING ON THIS WEB SITE IS PROVIDED FOR INFORMATIONAL PURPOSES ONLY. THIS WEB SITE, ITS CONTENT AND ITS LINKS ARE PROVIDED ON AN "AS IS" AND "AS AVAILABLE" BASIS AND ARE USED ONLY AT YOUR SOLE RISK, TO THE FULLEST EXTENT PERMISSIBLE BY LAW. THE COMPANY DISCLAIMS ALL WARRANTIES, EXPRESS OR IMPLIED, OF ANY KIND, REGARDING THIS WEB SITE (INCLUDING ITS CONTENT, HARDWARE, SOFTWARE AND LINKS), INCLUDING AS TO FITNESS FOR A PARTICULAR PURPOSE, MERCHANTABILITY, TITLE, NON INFRINGEMENT, RESULTS, ACCURACY, COMPLETENESS, ACCESSIBILITY, COMPATIBILITY, SECURITY AND FREEDOM FROM COMPUTER VIRUS. THE COMPANY WILL NOT BE LIABLE FOR ANY DAMAGES OR LOSSES, INCLUDING DIRECT, INDIRECT, CONSEQUENTIAL, SPECIAL, INCIDENTAL OR PUNITIVE DAMAGES AND/OR LOST PROFITS, IN CONNECTION WITH USE OF THE INTERNET, THIS WEB SITE, ITS CONTENT OR ITS LINKS
    Further, the Company will not be liable to you for any failure or delay by the Company to provide access to the Data or any of its obligations under these terms and conditions where such failure or delay is the direct or indirect result of any circumstances beyond the Company's reasonable control (and the Company's obligations will be suspended for the duration of such circumstances).
    5. Policy of Third Parties
    You may be required to separately agree to third party's policies if you use third party software to create or browse the Data or use a third party’s CAD data. In this case, the Company does not assume any responsibility for defects of such CAD data or the software of the third party or violation of their rights. Understand them before use.

    CAD Data Download (Unit Assembly)

    CAD Data Download: File Format
    生成

    Thank you for downloading the data.

    Click the Good IDEA! button when this application example is helpful.


    This data is utilized in order to list more useful application examples in the future.

    Cautions on the CAD data

    1. Assembly data shows the assembly drawings in the concept design phase. The sole purpose of the data is to explain the structure and functionality of the assembly and is not considered nor to be used as a final design.
      You will need to edit the Data so that it meets your specific design conditions.
    2. The CAD data unit assembly consists of sub-assemblies.
      Each sub-assembly unit can be used as it is or can be edited.
    3. * The part in the frame is a sub-assembly unit.

    4. The Data for fabricated parts is based on easy-to-edit dimensions and shapes in sketches and histories.
    5. The Data including the third-part components are made by the Company.

    Back to top

Back to top